I read The Devil's Adjutant by Michael Reynolds while on a recent business trip. Even though it purports to be a biography of Jochen Peiper, its really about the battle group that he commanded (Kampfgruppe Peiper, or KGP) during the Battle of the Bulge. There is a chapter on Peiper pre-Ardennes that describes his time as a Nazi who served in the 1st SS Panzer Division Leibstandarte Adolph Hitler throughout the war, and fought in many battles on the Eastern front. Leibstandarte translates as "bodyguard", so he was originally part of Hitler's bodyguard, and the 1st SS Panzer division was drawn from that cadre. There is also a chapter on his post-war life, where he was convicted of war crimes, served 11 years in prison, lived in France, and was eventually murdered by French Communists. However, the bulk of book is a day by day, blow by blow account of the fighting centered around KGP's attack during the battle.
The author does a really good job of correlating official histories and personal interviews with many of the combatants. The author spent a lot of time using both American and German sources, and its quite interesting to see how the two sides viewed the same action. He was also able to interview veterans from both sides. The author was unable to interview Peiper, so his commentary was taken from post-war interrogation, some of which should be taken with a grain of salt. The book has excellent maps and a very comprehensive order of battle for 1ss Panzer and the American 30th Infantry Division, both of which make it easy to follow the battle. You end up with a pretty solid picture of the "campaign", even if it only lasted a little more than a week.
I was inspired to pull out my copy of ASL's KGP maps and scenarios when I got home! I compared the KGP maps with those in the book, and they are pretty similar. I took a quick look at the scenarios, and they seem reasonable, too. The book was published after KGP was released, so it wasn't used as a reference for the game.
I think that Avalon Hill could have published a KGP III that focused on the battles around Stavelot. There were quite a few battles over multiple days, both over the bridge and the villages to the west. I also think that you could do an interesting game focusing on the entire campaign, either at a platoon or company level. A TCS module would be very interesting, although you would need a lot of vehicles. I am planning on putting together some scenarios based on the action, although I'm not exactly sure what rules set I'm going to use.
Monday, November 04, 2013


Tuesday, April 30, 2013
Stooge Con 2013 - Part II
I described my army lists in Part I of this post. Now I'll give a short report on each of my games.
Game 1 vs Ming Chinese (Jim Naughton). This was my first game in a couple of weeks, and my rust really showed. It was made worse by the fact that a) the weather was mist and b) Jim really has my number. The board had some steep hills on my right flank and a small patch of rough going on my left. Jim set up his cavalry on my left flank, his gunners in the steep hills on the right, and his big gun line in the center. I set up my knights and cavalry opposite his cavalry, my spears opposite his gun line, and the Dailami opposite his gunners.
I felt pretty good about the setup. I figured that I could use the mist to screen my guys as I closed. However, I didn't realize that it would force my commands to roll pips independently. Ugh. Still, I figured that I'd be able to drive the right groups forward and delay out of range until I got some pips. Sadly, it didn't work that way. The allied command was unreliable, and, of course, the cavalry command also got 1 pip. Instead of hanging tight, I decided to press on, figuring that things would work out. Dumb, dumb move. The attack sort of stumbled forward. The allied command activated, then promptly rolled a 1. The knights ended up right next to the rough going, and a Ps ambush killed two of them. That meant that they hit the cavalry line a bit disorganized, and I lost another two, breaking the command. On the other flank, the Dailami hit the gunners and started taking casualties. His light horse then hit my bows supporting the attack and quickly disposed of them. Another couple of bad rolls and the Dailami command broke. I had lost one or two other stands by then, so the whole army broke. What a beating...
Game 2 vs Teutonic Order (Dave Shepps). Once again, the weather played a critical role in this game. I decided to go with the B List in this game, as I didn't want my Kn(F) fighting the Teutonic Kn(S)! Dave set up with the knights in the middle and bows and light horse on either flank. I put my spear in the middle, the Dailami on my right flank, and the cavalry horde on the left. As the game started, I pressed hard with the cavalry while soft pedaling with the other two commands. Several bounds into the game, it started to rain. Knowing the that bows were now at a disadvantage, I attacked aggressively with the cavalry and the Dailami. The Dailami tore into the bows, and I keep feeding them into the melee until all of the bows were dead and the command was broken. On the other flank, the Cv(S) survived one bound of ineffective bow fire and then slammed home, quickly killing them. My other cavalry and light horse attacked the opposing light horse, finally killing enough to break that command, and therefore breaking the army. Luckily, I was able to avoid direct confrontation with the knights. Those guys were scary!
Game 3 vs French Ordonnance (Jim Wood). This was the first game that I played on Saturday. Jim was playing French Ordonnance. Once again, I wanted to avoid the Kn(F) vs Kn(S) matchup, so I went with the B List. There was a large woods on my left flank, but the rest of the table was wide open. I put the Dailami command near the woods, the spears in the center, and the big cavalry command on my right flank. Jim had three fairly similar commands consisting of artillery (S and I), bows (S and O), and knights (S). He deployed them on the half of the table with the woods forming a semi-circle around his camp. It was an intimidating sight, but I had a plan to attack it.
The main attack came from the cavalry wing. I used the light horse to screen the guns, then took the Cv(S) on a wide flanking move. The rest of the Cv(O) moved to 10 1/2 inches away from the guns and stopped. I was able to maneuver the Cv(S) into favorable overlaps against the Bw(S). It took several turns, but I was able to kill most of them. That freed up two units on the edge, and I was able to break the command by killing an Art(I) organ gun. There were still a few scattered units, so it would be a while before I'd be able to get into the flank of the next command.
The second part of the attack involved the Dailami. I moved the light horse from that command into a screen position while moving the Ax(S) in column through the edge of the woods towards the guns. They were able to approach without getting shot, but then Jim moved his dismounted knights (Bd(S)) to cover them. I was able to hold them off using the woods, then drive a few pairs of Dailami into the bows and guns. The Ax started to slowly grind them down, killing a Bw and Ax. But they were both S units, so it took a lot longer than I had hoped. Long enough for us to run out of time, since the cavalry was on the other side of the board, and I still needed to kill a few more units to break the command. In the end, I broke one of his commands and he broke none of mine, so it was a minor victory.
Game 4 vs New Kingdom Egyptians (Dave May). I decided to go with List A for this game, hoping to send my knights against his warband. As they say... "Be careful what you wish for!" There were some steep hills in the center of my setup area and a few rough patches in his. Otherwise, things were pretty open. I set up my three Arab commands slightly back, allowing the ally command to set up anywhere in front. The spears refused the left flank, the cavalry was in the center, and the Dailami were on the right. Dave set up all of his units in the left half (relative to me) of the board. He had a blade and bow command on the far left, followed by the warband block in the center, with an extended line of blades and bows on the right. He also had a pip dump command consisting of a general in a chariot and a bunch of Ps(I).
I was able to set up my knights across from the warbands and sent them straight in. It was a glorious attack... that completely failed! I lost a stand of knights in the first bound and two stands of light horse in the second. In retrospect, sending in the light horse to guard the flanks was a mistake. Anyways, it took a few more bounds before he was able to kill another stand and break that command. I was a bit bummed... five bounds in and I was down a command.
I sent the cavalry after the extended bow line. I used the light horse to screen, then attacked with double ranked Cv(O). It took a few bounds, but I was eventually able to grind down the bows and break them. I had been marching the Dailami like mad, and they were able to provide a bit of support in the attack. Dave attacked them with his pip dump general and managed to kill an aux stand and its supporting psiloi on my flank. I was then able to surround him with Dailami and their cavalry general and kill him. Of course, it wasn't enough to break the tiny command, as he made sure to allocate two pips to it next turn. Sigh.
Now we each had one broken command, and it would be a race to see who could break a second. Rather foolishly, I inched my spears forward after the knight command broke. The warband slammed into them, quickly killing two, but the attack stalled after that. I was able to delay them using the general and a light horse stand from the broken ally. In the center, I had to make my way through some broken chariots and blades. By the time I did that, a group of unbroken chariots arrived to prevent my cavalry from getting into the flanks of the warband. I think I would have been able to overwhelm them, but I had to kill way too many to break the command. In the end, neither of us were able to break the last command and the game ended in a draw.
Overall I went 2-1-1, so I was happy with the army's debut. Interestingly, I had better results with the three command "hammer" list than the four command "rapier" list. I do think the army is a winner, but it does so very slowly. It doesn't have any troops that can quickly kill opponents, but it is very resilient. The biggest enemy is time, so its worth working on ways to attack more efficiently. I'm definitely going to use them again in tournaments later this year.
I had a great time at the event. Thanks to Howard for running it, Legions Games for hosting it, and all of my opponents. I'm looking forward to playing them all again. (Well, except for the Ming. I hate those guys... :-)
Game 1 vs Ming Chinese (Jim Naughton). This was my first game in a couple of weeks, and my rust really showed. It was made worse by the fact that a) the weather was mist and b) Jim really has my number. The board had some steep hills on my right flank and a small patch of rough going on my left. Jim set up his cavalry on my left flank, his gunners in the steep hills on the right, and his big gun line in the center. I set up my knights and cavalry opposite his cavalry, my spears opposite his gun line, and the Dailami opposite his gunners.
I felt pretty good about the setup. I figured that I could use the mist to screen my guys as I closed. However, I didn't realize that it would force my commands to roll pips independently. Ugh. Still, I figured that I'd be able to drive the right groups forward and delay out of range until I got some pips. Sadly, it didn't work that way. The allied command was unreliable, and, of course, the cavalry command also got 1 pip. Instead of hanging tight, I decided to press on, figuring that things would work out. Dumb, dumb move. The attack sort of stumbled forward. The allied command activated, then promptly rolled a 1. The knights ended up right next to the rough going, and a Ps ambush killed two of them. That meant that they hit the cavalry line a bit disorganized, and I lost another two, breaking the command. On the other flank, the Dailami hit the gunners and started taking casualties. His light horse then hit my bows supporting the attack and quickly disposed of them. Another couple of bad rolls and the Dailami command broke. I had lost one or two other stands by then, so the whole army broke. What a beating...
Game 2 vs Teutonic Order (Dave Shepps). Once again, the weather played a critical role in this game. I decided to go with the B List in this game, as I didn't want my Kn(F) fighting the Teutonic Kn(S)! Dave set up with the knights in the middle and bows and light horse on either flank. I put my spear in the middle, the Dailami on my right flank, and the cavalry horde on the left. As the game started, I pressed hard with the cavalry while soft pedaling with the other two commands. Several bounds into the game, it started to rain. Knowing the that bows were now at a disadvantage, I attacked aggressively with the cavalry and the Dailami. The Dailami tore into the bows, and I keep feeding them into the melee until all of the bows were dead and the command was broken. On the other flank, the Cv(S) survived one bound of ineffective bow fire and then slammed home, quickly killing them. My other cavalry and light horse attacked the opposing light horse, finally killing enough to break that command, and therefore breaking the army. Luckily, I was able to avoid direct confrontation with the knights. Those guys were scary!
 |
| The cavalry attack the Teutonic left wing... |
 |
| ...while the Dailami attack the right. |
Game 3 vs French Ordonnance (Jim Wood). This was the first game that I played on Saturday. Jim was playing French Ordonnance. Once again, I wanted to avoid the Kn(F) vs Kn(S) matchup, so I went with the B List. There was a large woods on my left flank, but the rest of the table was wide open. I put the Dailami command near the woods, the spears in the center, and the big cavalry command on my right flank. Jim had three fairly similar commands consisting of artillery (S and I), bows (S and O), and knights (S). He deployed them on the half of the table with the woods forming a semi-circle around his camp. It was an intimidating sight, but I had a plan to attack it.
The main attack came from the cavalry wing. I used the light horse to screen the guns, then took the Cv(S) on a wide flanking move. The rest of the Cv(O) moved to 10 1/2 inches away from the guns and stopped. I was able to maneuver the Cv(S) into favorable overlaps against the Bw(S). It took several turns, but I was able to kill most of them. That freed up two units on the edge, and I was able to break the command by killing an Art(I) organ gun. There were still a few scattered units, so it would be a while before I'd be able to get into the flank of the next command.
The second part of the attack involved the Dailami. I moved the light horse from that command into a screen position while moving the Ax(S) in column through the edge of the woods towards the guns. They were able to approach without getting shot, but then Jim moved his dismounted knights (Bd(S)) to cover them. I was able to hold them off using the woods, then drive a few pairs of Dailami into the bows and guns. The Ax started to slowly grind them down, killing a Bw and Ax. But they were both S units, so it took a lot longer than I had hoped. Long enough for us to run out of time, since the cavalry was on the other side of the board, and I still needed to kill a few more units to break the command. In the end, I broke one of his commands and he broke none of mine, so it was a minor victory.
Game 4 vs New Kingdom Egyptians (Dave May). I decided to go with List A for this game, hoping to send my knights against his warband. As they say... "Be careful what you wish for!" There were some steep hills in the center of my setup area and a few rough patches in his. Otherwise, things were pretty open. I set up my three Arab commands slightly back, allowing the ally command to set up anywhere in front. The spears refused the left flank, the cavalry was in the center, and the Dailami were on the right. Dave set up all of his units in the left half (relative to me) of the board. He had a blade and bow command on the far left, followed by the warband block in the center, with an extended line of blades and bows on the right. He also had a pip dump command consisting of a general in a chariot and a bunch of Ps(I).
I was able to set up my knights across from the warbands and sent them straight in. It was a glorious attack... that completely failed! I lost a stand of knights in the first bound and two stands of light horse in the second. In retrospect, sending in the light horse to guard the flanks was a mistake. Anyways, it took a few more bounds before he was able to kill another stand and break that command. I was a bit bummed... five bounds in and I was down a command.
I sent the cavalry after the extended bow line. I used the light horse to screen, then attacked with double ranked Cv(O). It took a few bounds, but I was eventually able to grind down the bows and break them. I had been marching the Dailami like mad, and they were able to provide a bit of support in the attack. Dave attacked them with his pip dump general and managed to kill an aux stand and its supporting psiloi on my flank. I was then able to surround him with Dailami and their cavalry general and kill him. Of course, it wasn't enough to break the tiny command, as he made sure to allocate two pips to it next turn. Sigh.
 |
| The Egyptian chariots hold off the Arab cavalry. |
Now we each had one broken command, and it would be a race to see who could break a second. Rather foolishly, I inched my spears forward after the knight command broke. The warband slammed into them, quickly killing two, but the attack stalled after that. I was able to delay them using the general and a light horse stand from the broken ally. In the center, I had to make my way through some broken chariots and blades. By the time I did that, a group of unbroken chariots arrived to prevent my cavalry from getting into the flanks of the warband. I think I would have been able to overwhelm them, but I had to kill way too many to break the command. In the end, neither of us were able to break the last command and the game ended in a draw.
 |
| The Dailami butcher some skirmishers, but don't make it to the camp. |
Overall I went 2-1-1, so I was happy with the army's debut. Interestingly, I had better results with the three command "hammer" list than the four command "rapier" list. I do think the army is a winner, but it does so very slowly. It doesn't have any troops that can quickly kill opponents, but it is very resilient. The biggest enemy is time, so its worth working on ways to attack more efficiently. I'm definitely going to use them again in tournaments later this year.
I had a great time at the event. Thanks to Howard for running it, Legions Games for hosting it, and all of my opponents. I'm looking forward to playing them all again. (Well, except for the Ming. I hate those guys... :-)
Sunday, April 28, 2013
Stooge Con 2013 - Part I
My local club sponsored a DBM event this past weekend. I have been working on an early Arab army and was eager to try it in competition. The tournament used an open format using either the DBM or DBMM army lists.
I decided on the Umayyad Arab list (III/31, DBMM) set in 680 AD. My A List was the one that I used the most during play test. It consisted of four commands, three Arab and one Central Asian Ally, and was designed for maximum mobility:
Reg Cv(O) - CinC
9x Irr Cv(O)
3x Irr Cv(S)
6x Irr LH(O)
19 EE - Breaks on 7
Reg Cv(O) - SG
8x Reg Ax(S)
4x Reg Ps(O)
4x Irr Bw(O)
2x Irr Ps(O)
16 EE - Breaks on 5.5
Reg Cv(O) - SG
12x Irr Sp(I)
6x Irr Ps(O)
16 EE - Breaks on 5.5
Irr Kn(F) - AG
4x Irr Kn(F)
4x Irr LH(F)
6x Irr Bw(I)
15 EE - Breaks on 5
The theory was to use the allied command and the CinC's command to double team one of the enemy's commands. The spear would anchor some part of the line, and could double as a pip sink, since it wasn't designed to do fancy moves. The Dailami command would dominate bad going and be a threat to light troops and bows.
The B list was a hammer to balance the first list's rapier. It consisted of three large Arab commands:
Reg Cv(O) - CinC
14x Irr Cv(O)
7x Irr Cv(S)
3x Irr LH(O)
25 EE - Breaks on 9
Reg Cv(O) - SG
4x Irr Cv(O)
8x Irr Bw(O)
9x Reg Ax(S)
3x Irr LH(O)
25 EE - Breaks on 9
Reg Cv(O) - SG
16x Irr Sp(I)
8x Irr Ps(O)
21 EE - Breaks on 7
The theory here was pretty simple. The spears anchor the center, the Dailami attack through terrain on one flank, the cavalry attack in the open on the other. The big commands assured that I could take a lot of punishment before breaking. The huge cavalry command would give me a good shot at dominating one of the flanks. The biggest downside, of course, was that the commands were pretty clumsy. Looking down 21 cavalry stands can be pretty scary, but I often found that I could only engage with half of them, so I had a lot of guys standing around doing nothing. That said, losing all of the Cv(S) wasn't enough to break the command, so it could fight for a long time.
I'll describe my games in the next post. Slight spoiler, things did seem to go according to plan, except for the game that was played in the mist! :)
I decided on the Umayyad Arab list (III/31, DBMM) set in 680 AD. My A List was the one that I used the most during play test. It consisted of four commands, three Arab and one Central Asian Ally, and was designed for maximum mobility:
Reg Cv(O) - CinC
9x Irr Cv(O)
3x Irr Cv(S)
6x Irr LH(O)
19 EE - Breaks on 7
Reg Cv(O) - SG
8x Reg Ax(S)
4x Reg Ps(O)
4x Irr Bw(O)
2x Irr Ps(O)
16 EE - Breaks on 5.5
Reg Cv(O) - SG
12x Irr Sp(I)
6x Irr Ps(O)
16 EE - Breaks on 5.5
Irr Kn(F) - AG
4x Irr Kn(F)
4x Irr LH(F)
6x Irr Bw(I)
15 EE - Breaks on 5
The theory was to use the allied command and the CinC's command to double team one of the enemy's commands. The spear would anchor some part of the line, and could double as a pip sink, since it wasn't designed to do fancy moves. The Dailami command would dominate bad going and be a threat to light troops and bows.
The B list was a hammer to balance the first list's rapier. It consisted of three large Arab commands:
Reg Cv(O) - CinC
14x Irr Cv(O)
7x Irr Cv(S)
3x Irr LH(O)
25 EE - Breaks on 9
Reg Cv(O) - SG
4x Irr Cv(O)
8x Irr Bw(O)
9x Reg Ax(S)
3x Irr LH(O)
25 EE - Breaks on 9
Reg Cv(O) - SG
16x Irr Sp(I)
8x Irr Ps(O)
21 EE - Breaks on 7
The theory here was pretty simple. The spears anchor the center, the Dailami attack through terrain on one flank, the cavalry attack in the open on the other. The big commands assured that I could take a lot of punishment before breaking. The huge cavalry command would give me a good shot at dominating one of the flanks. The biggest downside, of course, was that the commands were pretty clumsy. Looking down 21 cavalry stands can be pretty scary, but I often found that I could only engage with half of them, so I had a lot of guys standing around doing nothing. That said, losing all of the Cv(S) wasn't enough to break the command, so it could fight for a long time.
I'll describe my games in the next post. Slight spoiler, things did seem to go according to plan, except for the game that was played in the mist! :)
 |
| The Sultan orders his troops forward! |
Wednesday, July 25, 2012
On the Table: Later Carthaginians
About four months ago I started playing around with a Later Carthaginian army list. The army is incredibly flexible, which can be a bit intimidated, but allows it to be very powerful. I have done quite well with it, going 4-2-1 in two local tournaments.
When I first started, the army was a hodge-podge of figures, some proxy, some correct. And like the Carthaginians, I had bought a good deal of them! Of course, eBay didn't exist during the Punic Wars. Over the summer, I slowly started replacing proxies with correct figures that I painted. I also touched up some of the figures that I bought to better match the army.
The first batch of figures that I painted was a group of Spanish Celtiberian infantry. The Celtiberians were a Celtic tribe from central Spain that fought in Hannibal's army. They looked a lot like other contemporary Celtic warriors except that they wore distinctive black cloaks. For shield patterns, I went with a combination of the Spanish "S" pattern and more "classic" Gallic patterns. I'm pretty happy with the result.

The next group of figures were the Numidians. Here, I painted a mix of light horse and auxiliaries (medium foot). The sources all agree that they wore plain linen clothes, but, as always, shield designs were a bit speculative. I chose to go with plain hide, since it looks more natural. I'm not super happy with the infantry, mostly because all of the models have the same pose and even though I used different colors for their clothes, the mix of earth tones tends to blend together. I am much happier with the horses, though.

This was the the first time that I used the Army Painter primers. For the infantry I used the Barbarian Flesh color and for the cavalry I used Fur Brown. I am generally pleased, although I'm not 100% sold. It is a very high quality primer, which is a big plus. It did save a lot of time with the infantry, since they had a lot of exposed skin. It saved a bit less time with the cavalry, since the color was quite reddish, so I had to wash multiple times to get it to be more brown. The only real issue that I had was that you don't get any natural shading with the lighter primers. I normally prime black, which allows you to get some nice shading effects and solid color boundaries by not painting those areas. You cannot do that with the light primers, so you have to spend a bit more time fussing with details. For some applications, such as infantry without much clothing, I do think its an overall win.

I painted a bunch of Spanish units as well. I've really just started with them, since I would like to paint a Spanish ally and then possibly a full Spanish list some day in the future. There were two main types of figures that I painted: light horse and scutarii. The light horse are pretty straightforward, consisting of guys with white tunics, leather hats, and plain shields on horseback. The scutarii were a bit more interesting. They had the same white tunics, but I got to paint some interesting patterns on their shields. There are only a couple of known shield patterns, so you have a lot of leeway, and I chose to give them a variety of Celtic patterns. Also note that I bought some of the units already painted, but re-painted their shields to match the others. Those are the figures in the first picture that have oval shields and are all in the same kneeling pose.


Finally, I touched up four stands of Liby-Phonecian cavalry. These guys, along with the spearmen (not pictured), are the only native Carthaginians in the list (for a loose definition of "native"). I stared with some Greek cavalry that I bought already painted and added patterns to the shields. They are all highly speculative, since we don't have much evidence for Carthaginian shield patterns. I got my inspiration from pictures in the Hannibal and the Punic Wars WAB supplement. I'm very happy with the way the shields turned out. I'm tempted to paint the shields on my spearmen (which I also bought already painted), but that is lower priority than painting all of my Spanish!

I'm still working on the army. By now, about half is actually painted by me. I plan on expanding the Spanish contingents as well as painting more Peoni cavalry and spearmen. I might create some shields for the Numidian infantry as well, just to make them a bit more interesting. The army is a lot of fun to play, and I still have a few different builds that I would like to try. I plan on using it again this fall at the Eastern conventions.
References.
1. Curtis, Allen E. Hannibal and the Punic Wars. Warhammer Historical, 2005.
2. Head, Duncan. Armies of the Macedonian and Punic Wars. Wargames Research Group, 1982.
When I first started, the army was a hodge-podge of figures, some proxy, some correct. And like the Carthaginians, I had bought a good deal of them! Of course, eBay didn't exist during the Punic Wars. Over the summer, I slowly started replacing proxies with correct figures that I painted. I also touched up some of the figures that I bought to better match the army.
The first batch of figures that I painted was a group of Spanish Celtiberian infantry. The Celtiberians were a Celtic tribe from central Spain that fought in Hannibal's army. They looked a lot like other contemporary Celtic warriors except that they wore distinctive black cloaks. For shield patterns, I went with a combination of the Spanish "S" pattern and more "classic" Gallic patterns. I'm pretty happy with the result.

The next group of figures were the Numidians. Here, I painted a mix of light horse and auxiliaries (medium foot). The sources all agree that they wore plain linen clothes, but, as always, shield designs were a bit speculative. I chose to go with plain hide, since it looks more natural. I'm not super happy with the infantry, mostly because all of the models have the same pose and even though I used different colors for their clothes, the mix of earth tones tends to blend together. I am much happier with the horses, though.

This was the the first time that I used the Army Painter primers. For the infantry I used the Barbarian Flesh color and for the cavalry I used Fur Brown. I am generally pleased, although I'm not 100% sold. It is a very high quality primer, which is a big plus. It did save a lot of time with the infantry, since they had a lot of exposed skin. It saved a bit less time with the cavalry, since the color was quite reddish, so I had to wash multiple times to get it to be more brown. The only real issue that I had was that you don't get any natural shading with the lighter primers. I normally prime black, which allows you to get some nice shading effects and solid color boundaries by not painting those areas. You cannot do that with the light primers, so you have to spend a bit more time fussing with details. For some applications, such as infantry without much clothing, I do think its an overall win.

I painted a bunch of Spanish units as well. I've really just started with them, since I would like to paint a Spanish ally and then possibly a full Spanish list some day in the future. There were two main types of figures that I painted: light horse and scutarii. The light horse are pretty straightforward, consisting of guys with white tunics, leather hats, and plain shields on horseback. The scutarii were a bit more interesting. They had the same white tunics, but I got to paint some interesting patterns on their shields. There are only a couple of known shield patterns, so you have a lot of leeway, and I chose to give them a variety of Celtic patterns. Also note that I bought some of the units already painted, but re-painted their shields to match the others. Those are the figures in the first picture that have oval shields and are all in the same kneeling pose.


Finally, I touched up four stands of Liby-Phonecian cavalry. These guys, along with the spearmen (not pictured), are the only native Carthaginians in the list (for a loose definition of "native"). I stared with some Greek cavalry that I bought already painted and added patterns to the shields. They are all highly speculative, since we don't have much evidence for Carthaginian shield patterns. I got my inspiration from pictures in the Hannibal and the Punic Wars WAB supplement. I'm very happy with the way the shields turned out. I'm tempted to paint the shields on my spearmen (which I also bought already painted), but that is lower priority than painting all of my Spanish!

I'm still working on the army. By now, about half is actually painted by me. I plan on expanding the Spanish contingents as well as painting more Peoni cavalry and spearmen. I might create some shields for the Numidian infantry as well, just to make them a bit more interesting. The army is a lot of fun to play, and I still have a few different builds that I would like to try. I plan on using it again this fall at the Eastern conventions.
References.
1. Curtis, Allen E. Hannibal and the Punic Wars. Warhammer Historical, 2005.
2. Head, Duncan. Armies of the Macedonian and Punic Wars. Wargames Research Group, 1982.
Saturday, May 05, 2012
Stooge Con 2012
I attended the local Stooge Con last weekend at Legions Games in the North Hills (a suburb of Pittsburgh). There were several historical miniatures events: an open DBM event, an open DBA event, and a matched pairs DBA event. For a local con, it was pretty well attended. We had about a dozen guys playing in the DBM event, and I think the DBA events had about 10 each.
I chose to bring my Later Carthaginians, which I had assembled over the last couple of months. What was unusual for me was that I had only painted about half of the army. I purchased most of the figures at various conventions over the years. The figures are mostly accurate, although I had to proxy some Numidian auxilia and light horse. Ugh. I like the army, so I am planning on correcting that in the near future. Anyways, here is my army list:
Later Carthaginian (205BC, in Africa)
CinC - Heavy Infantry
Reg Cv(O) (CinC)
Reg Sp(O)x6
Irr Wb(O)x18
25 EE, breaks on 9
SG - Medium Infantry
Reg Cv(O) (SG)
Irr Ax(S)x12
Irr Bd(F)x6
Irr El(I)x2
Irr Ps(O)
21.7 EE, breaks on 7.5
SG - Cavalry
Reg Cv(O) (SG)
Irr Cv(O)x3
Irr LH(O)x6
Irr Ps(S)x6
13 EE, breaks on 4.5
Numidian Allies
Irr LH(O) (AG)
Irr LH(O)x5
Irr Ax(I)x10
11 EE, breaks on 4
Army total: 70.5 EE, breaks on 35.5
Its about the same size as the Norman list that I had been playing, but it feels much more resilient. The idea was to put the heavy infantry block in the middle of the board, anchor one flank with the auxilia and fast blades, and use the two smaller cavalry commands on the other flank.
Game 1. I got pared against Rob Cunninham who was running Middle Imperial Romans (c. 250 AD). His army consisted of legionnaires (Reg Bd(O)), Roman auxilia (Reg Ax(O)), and a bunch of heavy cavalry (Reg Cv(O), I think). The terrain fell with some rough going on my left flank and a big hill in the center left of Rob's setup. I deployed my auxilia command along the rough going, the heavy foot command in the center, the Carthaginian cavalry on the right, and the Numidian ally on the far right. Rob deployed a cavalry command in front of my fast blades, one legion in front of each of my cavalry commands. He was the attacker and quickly advanced across the table. I used my light horse to skirmish against his legions, while I sent my medium foot against his cavalry. It was a bit of a crap shoot, but I managed to break his cavalry command. I was then able to combine my heavy and medium foot against the legions. While this was going on, my Numidians were taking a beating. Luckily I was able to slowly grind down one of his legions with my heavy foot, breaking his army a turn after the Numidians broke.
1-0
Game 2. I played against Howard West, the tournament director, and his Picts (roughly 100 AD). The terrain setup was similar to the first game, with some rough going on my left flank, a bunch of rough going in his backfield, and a hill in his center left (i.e., opposite my right). I used the exact same setup, medium foot, heavy foot, cavalry, left to right. He had a bunch of chariots in front of my medium foot, light horse in front of my light horse, and a HUGE block of lightly armored pikes (Irr Ax(I)) in front of my heavy foot. I had a reasonable advantage in light horse, so I attacked heavily there and held back across the line. Sadly, my light horse pretty much rolled over, and that command quickly broke. His cavalry was busy chasing my routed guys, so he couldn't bring them back into the fight. He was pretty aggressive with his chariots and pike, sending the former into my fast blades and the latter into my heavy foot block. I ended up grinding down his chariots with my medium foot and his pike took a beating from my warband. The latter was a bit of a surprise, but I always appreciate some luck! Once the chariots broke, I was able to get my fast blades into the action as well, eventually breaking his Ax(I) command and the army.
2-0
Game 3. I played against Doug Anderson and his Central Asian Turks (Uighur, c. 1000 AD). The Uighurs are a steppe army, so they are mostly cavalry (LH(F) and Cv(S)) and cataphracts (Kn(X), ugh), with a tiny group of spearmen. He also had a Turkish ally consisting of a mix of LH(S) and Cv(S). More ugh. There was much terrain to speak of, but there was a patch of rough on my left flank. So once again, I used the standard setup... medium foot, heavy foot, cavalry. His cavalry was way better than mine, so I had no choice but skirmish. Knowing that I would have trouble with the cavalry battle, I decided to drive my heavy foot as fast as I could at his spears. His light horse skirmished in front of my heavy foot, slowing me down, while my light horse skirmished in front of his cavalry. Eventually, his cavalry caught mine, and while they lasted much longer than I thought they would, they took a beating broke. I did have a few low odds chances of getting a general, but they never panned out. On my left flank, he decided to attack my medium foot instead of skirmishing against them. For the third time, my medium foot command turned out to be cavalry killers, chewing up the cavalry and savaging some supporting bowmen. At this point, we each had one broken command, and the foot battle in the center was about to begin. I started grinding down his guys, but he caused some casualties, too. He was able to get his cavalry back into the fight (after chasing off my cavalry), and that was the turning point. He was able to break up my spears, which had been protecting the flanks of the warband, and start grinding them down. Going into the last turn, we were both 2 guys away from breaking. He won the combats and I didn't, so my army broke, and I lost. Still, it turned out to be a fantastic game.
2-1
Overall, I was pretty happy. The Carthaginians did well... Hannibal would have been proud! My medium foot were the MVPs, breaking a cavalry command in every battle. The mix of elephants and fast blades has a surprising punch, and the the Ax(S) are surprisingly resilient. My cavalry seemed a bit weak, however, breaking in every battle. I think the commands are a bit too small, so I'm going to rework them for the future. Needless to say, the cavalry commander will get a talking to when we get back to Carthage. Oh, wait, the Uighur cavalry killed him...
I had a terrific weekend. All of the guys that I played are very cool, and I enjoyed playing against them. All of the games were very very exciting, too! I definitely plan on playing the army again. It felt much more resilient than the Normans, and while it doesn't have the flair of a knightly charge, the infantry is tough enough to grind opponents down.
I chose to bring my Later Carthaginians, which I had assembled over the last couple of months. What was unusual for me was that I had only painted about half of the army. I purchased most of the figures at various conventions over the years. The figures are mostly accurate, although I had to proxy some Numidian auxilia and light horse. Ugh. I like the army, so I am planning on correcting that in the near future. Anyways, here is my army list:
Later Carthaginian (205BC, in Africa)
CinC - Heavy Infantry
Reg Cv(O) (CinC)
Reg Sp(O)x6
Irr Wb(O)x18
25 EE, breaks on 9
SG - Medium Infantry
Reg Cv(O) (SG)
Irr Ax(S)x12
Irr Bd(F)x6
Irr El(I)x2
Irr Ps(O)
21.7 EE, breaks on 7.5
SG - Cavalry
Reg Cv(O) (SG)
Irr Cv(O)x3
Irr LH(O)x6
Irr Ps(S)x6
13 EE, breaks on 4.5
Numidian Allies
Irr LH(O) (AG)
Irr LH(O)x5
Irr Ax(I)x10
11 EE, breaks on 4
Army total: 70.5 EE, breaks on 35.5
Its about the same size as the Norman list that I had been playing, but it feels much more resilient. The idea was to put the heavy infantry block in the middle of the board, anchor one flank with the auxilia and fast blades, and use the two smaller cavalry commands on the other flank.
Game 1. I got pared against Rob Cunninham who was running Middle Imperial Romans (c. 250 AD). His army consisted of legionnaires (Reg Bd(O)), Roman auxilia (Reg Ax(O)), and a bunch of heavy cavalry (Reg Cv(O), I think). The terrain fell with some rough going on my left flank and a big hill in the center left of Rob's setup. I deployed my auxilia command along the rough going, the heavy foot command in the center, the Carthaginian cavalry on the right, and the Numidian ally on the far right. Rob deployed a cavalry command in front of my fast blades, one legion in front of each of my cavalry commands. He was the attacker and quickly advanced across the table. I used my light horse to skirmish against his legions, while I sent my medium foot against his cavalry. It was a bit of a crap shoot, but I managed to break his cavalry command. I was then able to combine my heavy and medium foot against the legions. While this was going on, my Numidians were taking a beating. Luckily I was able to slowly grind down one of his legions with my heavy foot, breaking his army a turn after the Numidians broke.
1-0
Game 2. I played against Howard West, the tournament director, and his Picts (roughly 100 AD). The terrain setup was similar to the first game, with some rough going on my left flank, a bunch of rough going in his backfield, and a hill in his center left (i.e., opposite my right). I used the exact same setup, medium foot, heavy foot, cavalry, left to right. He had a bunch of chariots in front of my medium foot, light horse in front of my light horse, and a HUGE block of lightly armored pikes (Irr Ax(I)) in front of my heavy foot. I had a reasonable advantage in light horse, so I attacked heavily there and held back across the line. Sadly, my light horse pretty much rolled over, and that command quickly broke. His cavalry was busy chasing my routed guys, so he couldn't bring them back into the fight. He was pretty aggressive with his chariots and pike, sending the former into my fast blades and the latter into my heavy foot block. I ended up grinding down his chariots with my medium foot and his pike took a beating from my warband. The latter was a bit of a surprise, but I always appreciate some luck! Once the chariots broke, I was able to get my fast blades into the action as well, eventually breaking his Ax(I) command and the army.
2-0
Game 3. I played against Doug Anderson and his Central Asian Turks (Uighur, c. 1000 AD). The Uighurs are a steppe army, so they are mostly cavalry (LH(F) and Cv(S)) and cataphracts (Kn(X), ugh), with a tiny group of spearmen. He also had a Turkish ally consisting of a mix of LH(S) and Cv(S). More ugh. There was much terrain to speak of, but there was a patch of rough on my left flank. So once again, I used the standard setup... medium foot, heavy foot, cavalry. His cavalry was way better than mine, so I had no choice but skirmish. Knowing that I would have trouble with the cavalry battle, I decided to drive my heavy foot as fast as I could at his spears. His light horse skirmished in front of my heavy foot, slowing me down, while my light horse skirmished in front of his cavalry. Eventually, his cavalry caught mine, and while they lasted much longer than I thought they would, they took a beating broke. I did have a few low odds chances of getting a general, but they never panned out. On my left flank, he decided to attack my medium foot instead of skirmishing against them. For the third time, my medium foot command turned out to be cavalry killers, chewing up the cavalry and savaging some supporting bowmen. At this point, we each had one broken command, and the foot battle in the center was about to begin. I started grinding down his guys, but he caused some casualties, too. He was able to get his cavalry back into the fight (after chasing off my cavalry), and that was the turning point. He was able to break up my spears, which had been protecting the flanks of the warband, and start grinding them down. Going into the last turn, we were both 2 guys away from breaking. He won the combats and I didn't, so my army broke, and I lost. Still, it turned out to be a fantastic game.
2-1
Overall, I was pretty happy. The Carthaginians did well... Hannibal would have been proud! My medium foot were the MVPs, breaking a cavalry command in every battle. The mix of elephants and fast blades has a surprising punch, and the the Ax(S) are surprisingly resilient. My cavalry seemed a bit weak, however, breaking in every battle. I think the commands are a bit too small, so I'm going to rework them for the future. Needless to say, the cavalry commander will get a talking to when we get back to Carthage. Oh, wait, the Uighur cavalry killed him...
I had a terrific weekend. All of the guys that I played are very cool, and I enjoyed playing against them. All of the games were very very exciting, too! I definitely plan on playing the army again. It felt much more resilient than the Normans, and while it doesn't have the flair of a knightly charge, the infantry is tough enough to grind opponents down.
Saturday, May 14, 2011
Force on Force: Infantry Rules Mini-Review
While attending Stooge Con, I noticed up a new set of rules titled Force on Force. They are published by Osprey and contain rules for modern skirmish gaming. I've always been interested about the recent campaigns in Afghanistan, both Soviet and NATO. I read through them at the store, and they seemed to be pretty interesting. After a quick check of a few online reviews, I decided to buy them.
Last week, I had a chance to kick the tires on the rules set. As I don't have any modern minis, I set up a few fights between American and German troops in France. First I'll give a quick overview of the rules then I'll give a mini AAR.
The basic unit in the game is a fire team of 2-5 men. Each team is rated on three things; Troop Quality, Morale, and Confidence. TQ and Morale ratings are represented as a die ranging from d6 to d12. To pass a check, the unit or soldier must roll 4 or higher on its die. As you can see, units rated d6 have a harder time passing that units rated d12. The Confidence rating is given as Low, Normal, or High, and affects when a unit has to take a morale check.
Shooting is done as a unit, and the target is also a unit. You cannot specify a single soldier as a target. To shoot, you roll one TQ die per soldier in the unit. You add one die if the unit has a light support weapon (LMG, SAW, grenade launcher) and two dice if it has a heavy support weapon (HMG, RPG). In addition, you roll an extra die if you are in effective range, which is based upon your TQ. You keep track of all of your successes, included the value rolled. The target rolls one die for each soldier in the unit, plus a number of dice based upon the terrain it occupies. Every success the defender rolls can negate one of the attacker's successes that has an equal or lower value. Its not just based on number of successes. For example, an attacker rolls four dice, scoring 1, 4, 5, 8. The defender rolls four dice, scoring 2, 7, 7, 7. The 1 and 2 are discarded. Two of the defender's 7s negate the attacker's 4 and 5 rolls, but the final 7 doesn't negate the attacker's 8. Therefore, the defender takes one hit.
One other interesting bit about fire combat is that its executed in a round of fire. If a unit is shot at, it has a chance to respond. When a unit declares that its shooting at a target, both the attacker and the defender make a TQ check using a single die. If the attacker rolls equal or better than the defender, he shoots first. If not, the defender shoots first! Basically, the TQ check represents who gets the jump in a firefight. Note that a unit can respond multiple times if multiple units attack it, although it rolls one less die each time.
At the beginning of each game turn, the two sides make a modified TQ check. The side that wins gets the initiative, and sequentially activates all of its units. The non-initiative player can react to any of the initiative player's activations, and then can move any left over units at the end of the turn. There are a bunch of different activations, but there are four main ones: fire, move, fire and move, and overwatch. The first three are exactly what they say, while the overwatch action allows you to fire at any units that react. Note that the defender cannot react to overwatch actions, but can react to the others. This allows the initiative player to set up a bounding overwatch, where one unit covers another as it moves. Reacting units can choose to move or fire as a reaction, but while a unit can fire multiple times, it can move only once in a turn. When a unit reacts, both it and the active unit make a TQ check, and the winner gets to perform its action first. So, a unit can attempt to shoot at an enemy unit, but if the enemy unit wins the reaction test, it can move out of LOS before the activated unit shoots. The action/reaction system makes the game very fluid.
Morale checks are handled by making a TQ check for every soldier in the unit. If the unit passes more checks than it fails, its fine. If not, it is pinned, which forces it to take cover (i.e., not move) and reduces its TQ by one die. If a unit is pinned a second time, it falls back. A unit recovers from pinning at the end of the turn.
That's a basic summary of the rules. Now a quick AAR of my two fights.
In the first fight, I had two teams of Germans and two teams of Americans do a meeting engagement in the woods. I wasn't too clever, and tried a basic bounding overwatch advance into each other. One German and one American team blundered into each other, with the Germans firing first and causing some casualties. The second German team followed up and finished off the Americans. In the next turn, they started dragging the wounded Americans back to their lines as prisoners, while the initial team took up a position at the edge of the woods. The remaining Americans didn't have much chance, so I tried to charge the Germans in the woods! It didn't work so well... two of the Americans were hit, and the unit failed its morale check. In the next turn, the Germans finished off the remaining Americans.
In the second fight, I had a German half squad and MG team defending a couple of houses. The Americans had three teams of riflemen, a light mortar team, and a MG team. The assault group consisted of two rifle teams on the left flank. The support group had the MG team, the mortar team, and the third rifle team on the right flank. As the assault teams moved through the woods, the support teams took up their positions. The Germans fired on the support teams, quickly knocking out the MG team with their own machine gun, while the half squad waited behind a wall trading shots with its American counterpart in another set of trees. The assault troops managed to get behind a second wall near the house with the machine gun, and caused several casualties to the German half squad. The German machine gun wasn't able to do to much, although it did take out one or two more troopers. Finally, the weight of American fire took out the rest of the German half squad, leaving the German MG team alone to defend the house. A lucky mortar shot wounded the two machine gunners, and the fight was over.
Overall, I like the system. The game moves fairly quickly, and both players are involved all of the time. The results seemed to make sense. I made a lot of mistakes in the first game, and a lot less in the second. There are rules for vehicles, artillery, and air support, but I haven't really read them yet. I'm definitely looking forward to trying it out a bit more. Hopefully I'll be able to find a game at Origins.
Last week, I had a chance to kick the tires on the rules set. As I don't have any modern minis, I set up a few fights between American and German troops in France. First I'll give a quick overview of the rules then I'll give a mini AAR.
The basic unit in the game is a fire team of 2-5 men. Each team is rated on three things; Troop Quality, Morale, and Confidence. TQ and Morale ratings are represented as a die ranging from d6 to d12. To pass a check, the unit or soldier must roll 4 or higher on its die. As you can see, units rated d6 have a harder time passing that units rated d12. The Confidence rating is given as Low, Normal, or High, and affects when a unit has to take a morale check.
Shooting is done as a unit, and the target is also a unit. You cannot specify a single soldier as a target. To shoot, you roll one TQ die per soldier in the unit. You add one die if the unit has a light support weapon (LMG, SAW, grenade launcher) and two dice if it has a heavy support weapon (HMG, RPG). In addition, you roll an extra die if you are in effective range, which is based upon your TQ. You keep track of all of your successes, included the value rolled. The target rolls one die for each soldier in the unit, plus a number of dice based upon the terrain it occupies. Every success the defender rolls can negate one of the attacker's successes that has an equal or lower value. Its not just based on number of successes. For example, an attacker rolls four dice, scoring 1, 4, 5, 8. The defender rolls four dice, scoring 2, 7, 7, 7. The 1 and 2 are discarded. Two of the defender's 7s negate the attacker's 4 and 5 rolls, but the final 7 doesn't negate the attacker's 8. Therefore, the defender takes one hit.
One other interesting bit about fire combat is that its executed in a round of fire. If a unit is shot at, it has a chance to respond. When a unit declares that its shooting at a target, both the attacker and the defender make a TQ check using a single die. If the attacker rolls equal or better than the defender, he shoots first. If not, the defender shoots first! Basically, the TQ check represents who gets the jump in a firefight. Note that a unit can respond multiple times if multiple units attack it, although it rolls one less die each time.
At the beginning of each game turn, the two sides make a modified TQ check. The side that wins gets the initiative, and sequentially activates all of its units. The non-initiative player can react to any of the initiative player's activations, and then can move any left over units at the end of the turn. There are a bunch of different activations, but there are four main ones: fire, move, fire and move, and overwatch. The first three are exactly what they say, while the overwatch action allows you to fire at any units that react. Note that the defender cannot react to overwatch actions, but can react to the others. This allows the initiative player to set up a bounding overwatch, where one unit covers another as it moves. Reacting units can choose to move or fire as a reaction, but while a unit can fire multiple times, it can move only once in a turn. When a unit reacts, both it and the active unit make a TQ check, and the winner gets to perform its action first. So, a unit can attempt to shoot at an enemy unit, but if the enemy unit wins the reaction test, it can move out of LOS before the activated unit shoots. The action/reaction system makes the game very fluid.
Morale checks are handled by making a TQ check for every soldier in the unit. If the unit passes more checks than it fails, its fine. If not, it is pinned, which forces it to take cover (i.e., not move) and reduces its TQ by one die. If a unit is pinned a second time, it falls back. A unit recovers from pinning at the end of the turn.
That's a basic summary of the rules. Now a quick AAR of my two fights.
In the first fight, I had two teams of Germans and two teams of Americans do a meeting engagement in the woods. I wasn't too clever, and tried a basic bounding overwatch advance into each other. One German and one American team blundered into each other, with the Germans firing first and causing some casualties. The second German team followed up and finished off the Americans. In the next turn, they started dragging the wounded Americans back to their lines as prisoners, while the initial team took up a position at the edge of the woods. The remaining Americans didn't have much chance, so I tried to charge the Germans in the woods! It didn't work so well... two of the Americans were hit, and the unit failed its morale check. In the next turn, the Germans finished off the remaining Americans.
In the second fight, I had a German half squad and MG team defending a couple of houses. The Americans had three teams of riflemen, a light mortar team, and a MG team. The assault group consisted of two rifle teams on the left flank. The support group had the MG team, the mortar team, and the third rifle team on the right flank. As the assault teams moved through the woods, the support teams took up their positions. The Germans fired on the support teams, quickly knocking out the MG team with their own machine gun, while the half squad waited behind a wall trading shots with its American counterpart in another set of trees. The assault troops managed to get behind a second wall near the house with the machine gun, and caused several casualties to the German half squad. The German machine gun wasn't able to do to much, although it did take out one or two more troopers. Finally, the weight of American fire took out the rest of the German half squad, leaving the German MG team alone to defend the house. A lucky mortar shot wounded the two machine gunners, and the fight was over.
Overall, I like the system. The game moves fairly quickly, and both players are involved all of the time. The results seemed to make sense. I made a lot of mistakes in the first game, and a lot less in the second. There are rules for vehicles, artillery, and air support, but I haven't really read them yet. I'm definitely looking forward to trying it out a bit more. Hopefully I'll be able to find a game at Origins.
Wednesday, May 11, 2011
Stooge Con 2011 AAR
Two weeks ago, our local wargames group hosted a mini-con. There were about eight people playing DBA and the same number playing DBM. It was hosted a local game store, Legions Hobbies & Games, which sells all sort of cool stuff and has a huge gaming area.
I played DBM and brought the latest version of my Norman army. The army has evolved over time, starting as a Sicilian group including some Arab allies and changing into William the Conquerer's list utilizing a mix of regular and dismounted knights.
III/52 Norman
Command 1
CinC Irr Kn(F)
Milites Irr Kn(F) x8
Scouts Irr LH(I) x3
Archers Irr Bw(I) x2
Peasants Irr Hd(O) x12
20 EE, Breaks on 7
Command 2
Sub-General Irr Kn(F)
Milites Irr Kn(F) x4
Dismounted Irr Bd(O) x9
Spearmen Irr Sp(I) x4
18 EE, Breaks on 6
Command 3
Sub-General Irr Kn(F)
Archers Irr Bw(I) x10
Crossbowmen Irr Bw(O) x6
17 EE, Breaks on 6
Command 4
Breton SG Irr Cv(O)
Breton Horse Irr Cv(O) x6
Dismounted Irr Bd(O) x4
Spearmen Irr Sp(I) x6
17 EE, Breaks on 6
Army total: 72 EE, Breaks on 36
I was a little pressed for time, so I only got to play three games. I went 1-1-1, and would probably have gone 2-1 if I didn't arrive late on Saturday. Overall, I was pretty pleased.
The first game was against Howard West's Bosporans. His army had a bunch of Ax, Sp, Bw, and Kn. He also had a Scythian ally with a bunch of LH(F). There was a large batch of rough going in the middle of the table, and two smaller areas on the flanks. I set up with my Bretons on the right flank, my dismounted milites on the left, and my knights and bowmen in the middle. I pushed the whole lot forward, and Howard was happy to oblige. The match almost ended in disaster, as his bowmen shot up my Breton cavalry pretty badly. Luckily, I managed to extract them before the command broke. On the other flank, I had a slight numerical advantage, so I decided to sweep the rough going clear with my dismounted milites. Through sheer weight of numbers, and a bit of luck, I was able to push the Ax out of the rough going and was in a pretty good position to put pressure on his flank. In the middle, my bowmen and knights were slowly grinding down Howard's Sp and remaining Bw. The losses were spread over several commands, so I wasn't able to break anything before time was called, but we sort of agreed that with a couple of more bounds, I had a good chance of breaking a command and possibly the army. It ended in a draw, but I felt pretty good.
That feeling was quickly erased in my second game agains Rob Cunningham and his New Kingdom Egyptians. The terrain featured two areas of difficult going on Rob's flanks, and a river near my back edge. Rob set up his bow and blade line anchored between the two pieces of terrain. He also placed two groups of psiloi in ambush, one in each piece. I set up with my Bretons on the left flank, the knights and bows in the middle, and the mixed blade and knight command on the right. I made quite a few mistakes in this fight. First, I tried to sweep the difficult going with my blades. I forgot that they couldn't do group moves in difficult terrain, and by the time that I remembered, they were out of position to attack the bows. I tried to make an end around with some knights on the other flank, but they got tied up by the psiloi. In the center, I lumbered forward with the bows and main group of knights. I managed to charge the knights as a cohesive group, but didn't kill a thing on the charge. After that, it didn't take long for Rob to break both my knight and bow commands, causing me to go down in defeat. We had a good talk about using Normans and fast knights after the battle, which would go on to be a big help the next day...
On Sunday, I played my last game against Carl and his Successor Army. I knew he had a whole lot of pike, so I planned to dismount my main knight command at setup. When the terrain fell, there was a lot of rough going on my right flank, but my left flank was wide open. Figuring that I had nothing to lose, I sent the Breton command on a flank march. The plan was to engage the pikes with my blades, delay on my right flank with the light horse, and use the Breton cavalry to flank the pike block. I set up with my bow line in front of my blades, and marched forward. Carl's pikes did the same. I got lucky, and my flank march arrived on turn two. This forced Carl to divert a lot of pips to the counter them just as the blades and pikes started their shoving match. I then sent my reserve group of knights to aid the flank march. Carl was forced to spend pips all over the entire battlefield while I was able to focus two commands on one of his, including a group of impetuous knights. I managed to close the door and kill his pike subgeneral, causing even greater command problems. He did kill quite a bit of my guys, but not before I was able to overwhelm the command opposing the flank march and break it. A few bounds later, they called time, and I won by virtue of breaking a command without losing any.
I was very pleased with this last game. I formulated a plan and executed it almost exactly as I had wanted. I was able to delay in the areas where I couldn't win and was able to combine forces on one command where I could. By engaging the entire line at once, I was able to force Carl to spend pips in places where he didn't want to spend them. I was pretty happy that my crazy plan had worked.
I had a really good time at the event. I thought I played well, except for the middle game, and I felt much more comfortable with the rules. I also felt more comfortable with my army, utilizing its strengths and mostly handling its weaknesses. Its a fun army to play, although you have to deal with the fact that sometimes you will lose in a spectacular fashion! In that case, you have to look on the bright side... you will get to spend more time shopping in the dealer's hall!
I played DBM and brought the latest version of my Norman army. The army has evolved over time, starting as a Sicilian group including some Arab allies and changing into William the Conquerer's list utilizing a mix of regular and dismounted knights.
III/52 Norman
Command 1
CinC Irr Kn(F)
Milites Irr Kn(F) x8
Scouts Irr LH(I) x3
Archers Irr Bw(I) x2
Peasants Irr Hd(O) x12
20 EE, Breaks on 7
Command 2
Sub-General Irr Kn(F)
Milites Irr Kn(F) x4
Dismounted Irr Bd(O) x9
Spearmen Irr Sp(I) x4
18 EE, Breaks on 6
Command 3
Sub-General Irr Kn(F)
Archers Irr Bw(I) x10
Crossbowmen Irr Bw(O) x6
17 EE, Breaks on 6
Command 4
Breton SG Irr Cv(O)
Breton Horse Irr Cv(O) x6
Dismounted Irr Bd(O) x4
Spearmen Irr Sp(I) x6
17 EE, Breaks on 6
Army total: 72 EE, Breaks on 36
I was a little pressed for time, so I only got to play three games. I went 1-1-1, and would probably have gone 2-1 if I didn't arrive late on Saturday. Overall, I was pretty pleased.
The first game was against Howard West's Bosporans. His army had a bunch of Ax, Sp, Bw, and Kn. He also had a Scythian ally with a bunch of LH(F). There was a large batch of rough going in the middle of the table, and two smaller areas on the flanks. I set up with my Bretons on the right flank, my dismounted milites on the left, and my knights and bowmen in the middle. I pushed the whole lot forward, and Howard was happy to oblige. The match almost ended in disaster, as his bowmen shot up my Breton cavalry pretty badly. Luckily, I managed to extract them before the command broke. On the other flank, I had a slight numerical advantage, so I decided to sweep the rough going clear with my dismounted milites. Through sheer weight of numbers, and a bit of luck, I was able to push the Ax out of the rough going and was in a pretty good position to put pressure on his flank. In the middle, my bowmen and knights were slowly grinding down Howard's Sp and remaining Bw. The losses were spread over several commands, so I wasn't able to break anything before time was called, but we sort of agreed that with a couple of more bounds, I had a good chance of breaking a command and possibly the army. It ended in a draw, but I felt pretty good.
That feeling was quickly erased in my second game agains Rob Cunningham and his New Kingdom Egyptians. The terrain featured two areas of difficult going on Rob's flanks, and a river near my back edge. Rob set up his bow and blade line anchored between the two pieces of terrain. He also placed two groups of psiloi in ambush, one in each piece. I set up with my Bretons on the left flank, the knights and bows in the middle, and the mixed blade and knight command on the right. I made quite a few mistakes in this fight. First, I tried to sweep the difficult going with my blades. I forgot that they couldn't do group moves in difficult terrain, and by the time that I remembered, they were out of position to attack the bows. I tried to make an end around with some knights on the other flank, but they got tied up by the psiloi. In the center, I lumbered forward with the bows and main group of knights. I managed to charge the knights as a cohesive group, but didn't kill a thing on the charge. After that, it didn't take long for Rob to break both my knight and bow commands, causing me to go down in defeat. We had a good talk about using Normans and fast knights after the battle, which would go on to be a big help the next day...
On Sunday, I played my last game against Carl and his Successor Army. I knew he had a whole lot of pike, so I planned to dismount my main knight command at setup. When the terrain fell, there was a lot of rough going on my right flank, but my left flank was wide open. Figuring that I had nothing to lose, I sent the Breton command on a flank march. The plan was to engage the pikes with my blades, delay on my right flank with the light horse, and use the Breton cavalry to flank the pike block. I set up with my bow line in front of my blades, and marched forward. Carl's pikes did the same. I got lucky, and my flank march arrived on turn two. This forced Carl to divert a lot of pips to the counter them just as the blades and pikes started their shoving match. I then sent my reserve group of knights to aid the flank march. Carl was forced to spend pips all over the entire battlefield while I was able to focus two commands on one of his, including a group of impetuous knights. I managed to close the door and kill his pike subgeneral, causing even greater command problems. He did kill quite a bit of my guys, but not before I was able to overwhelm the command opposing the flank march and break it. A few bounds later, they called time, and I won by virtue of breaking a command without losing any.
I was very pleased with this last game. I formulated a plan and executed it almost exactly as I had wanted. I was able to delay in the areas where I couldn't win and was able to combine forces on one command where I could. By engaging the entire line at once, I was able to force Carl to spend pips in places where he didn't want to spend them. I was pretty happy that my crazy plan had worked.
I had a really good time at the event. I thought I played well, except for the middle game, and I felt much more comfortable with the rules. I also felt more comfortable with my army, utilizing its strengths and mostly handling its weaknesses. Its a fun army to play, although you have to deal with the fact that sometimes you will lose in a spectacular fashion! In that case, you have to look on the bright side... you will get to spend more time shopping in the dealer's hall!
Sunday, March 27, 2011
Cold Wars 2011 AAR
I apologize for the delay on this one. Work was busy the first week back, and I was out of it most of this week with strep throat. OK. On with the show...
I arrived at Cold Wars early Thursday afternoon. I was feeling a bit under the weather (yes, its been a rough beginning of the year), so I was a bit medicated. After enjoying a spicy dinner at the crazy Thai place, I kicked off the weekend with the Dismounting Armies DBA tournament. I played one of the classic "cheater" armies, the Anglo Normans (i.e., post-conquest Normans). In my first game, I played against the East Franks, which were very similar. I managed to shoot one of his knights pretty quickly, going up 1-0. Then I maneuvered to get a couple of double overlaps, but couldn't seal the deal. My opponent kept coming back, and slowly picked off my guys. He wen't up 3-1, but we managed to have two quick kill situations, one on my side and one on his. He won both rolls, so I lost the game 1-4. My next opponent played the Early Byzantines. It turned out to be a bad match up for him. He had mostly cavalry while I had all knights. I don't remember much of the action due to the cold medicine, but I do remember basically grinding him down with bad match ups. I won 4-2. In my final game, I played the Medieval French, one of the other classic "cheater" armies. I managed to do something right, and get my crossbows in front of his knights and my spearmen in front of his bows. He dismounted his knights to take on my bow, but I managed to work my knights into his blades. On the other side, my spearmen were making progress against his bows. I was up 3-2 and deliberating a move when they called "5 minutes", so I just said f--- it and charged a spear into an overlap position against a bow. I rolled a six, he rolled a one, and I finished the tournament 2-1. I ended up coming in third place, which wasn't bad for someone high on sudafed.
I felt a bit better Friday. I was supposed to teach a painting class at 10:00 and one at 3:00, then play in a DBA even that evening. At like 9:30 I found out that they messed up the schedule, and my classes were back to back at 12:00 and 2:00. I had a little bit of extra time, so I watched the beginning of the double DBA tournament and then walked around the flea market. I picked up a couple of stands of Gallic cavalry and warriors (you can never really have enough), but that was about it. I showed up around 11:30 for my first class, got everything set up, and no one made it. :-( It turned out that no one made any of the noon classes because of the scheduling snafu, so I gave one of the other artists a private class on painting horses. I did have two people show up for my 2 PM heraldry class, and they really enjoyed it. Its definitely a cool feeling when you teach someone something and you can see that they get it. One of the people attending does 1/300 aircraft, and we discussed some techniques for painting that as well. They complimented my both on my work and my teaching, so it was a very cool experience. I go to the crazy art college, and I'm a bit intimidated by some of the people there. Some of them are real artists, as in, have sculpted stuff for miniatures companies or have painted stuff for commission. I'm starting to feel a bit more comfortable there, and it really is a cool experience.
Friday night I got sucked into playing a game of DBM in 25mm instead of the DBA tournament. To be honest, I was still a bit tired, so I didn't mind a quick game. I played the Sciri, which is a Germanic tribe from the end of the 4th century AD. The army was composed of knights, warband, bows, and some allied Hunnic light horse. It was an army borrowed from a fellow DBM gamer, and it was painted beautifully. I played against a random Chinese army consisting of spearmen, bowmen, cavalry, and chariots. The guy set up in the corner, utilizing temporary fortifications to anchor his wing. I sent my warbands after his spearmen, my bows after his bows, and my mounted troops after his mounted troops. I figured, I have no idea how these armies work, so charging seemed like the right idea! I managed to gain an early advantage. The combined weight of my warband and bows broke his smaller spearmen command. Then his cavalry absolutely crushed the Huns. Ugh. I sent the knights in after the cavalry and chariots. I started to grind them down, but then he managed to break my warband command. Things were starting to get pretty hairy, where one or two losses on either side would determine the winner, when I made a rookie mistake. I advanced a column of knights, but left a kink in the line. Sure enough, I lost a combat in front of them, recoiled into the column, which killed the one guy needed to break the army. Oh well, it was a good game!
Saturday was the double DBM tournament. My partner and I played an Early Vietnamese army, affectionately known as a "wall of junk". It consisted of a bunch of inferior bow, a bunch of warbard, a bunch of mediocre light troops, and three elephants! The army had roughly 140 elements, which is more than double the size of my Norman army! Crazy. Our first game was against the Neo-Elamites, a biblical army with a very similar composition (IOW, wall of junk). Both armies stretched from board edge to board edge, so there wasn't any fancy maneuvering. We managed to get the favorable match ups, so ended up with a slight advantage. Since there were so many troops on the table, we ran out of time before either side completely broke. They did break one of our smaller commands, but we broke his C-in-C's command, so we won via points. Our second game was against the Later Achaemenid Persians, which was composed of a bunch of cavalry, a bunch of Greek hoplites, and a handful of lighter troops. They demonstrated on my wing, and sent the other cavalry command into our bows, where it was promptly shot to pieces. We simply charged the warband into the spear block, quickly breaking it in several bounds. It took us several more turns to break their army, but not before they broke the warband command. Ironically, the spearmen did more damage after they broke! Anyways, we had won again, so we were headed to the championship game! In that, we played a Bosporan army, composed of knights, light horse, and assorted light troops. We lined up with the auxilia in some bad going in the middle, the two bow commands on the wings, and the warband as a reserve. The Bosporans did a general advance, hitting our three main commands with knight attacks and adding the light horse to the center attack. Our middle command and right commands collapsed, but we managed to break their C-in-C command. We had lost two smaller commands, while they lost their biggest command. Now it was a race to see who could break the final command. I was doing alright holding off the knight command on the left, killing a knight and some light horse, and devastating the light infantry supporting them. Once again, I was in a situation where the next element lost determined the winner. They charged in with the knights, my bows held off a couple of attacks, but couldn't stop them all. My command finally broke, breaking our army. We were one element away from breaking theirs! Yet another close game. It was disappointing losing in the finals, but it was very cool actually making it there.
I did some shopping every day of the con. Overall, I thought it was a bit mediocre. I was mostly focused on ancients, and there weren't a lot of things to get. In addition to the Gauls, I got a half dozen Hundred Years War English longbowmen, a couple of army books for various games, an interesting book on the Mongols (which I'm halfway through by now), a used copy of Hornet Leader, and a copy of Steel Wolves (which I've been lusting over for quite a while). I was hoping for more in the way of painted guys, but most of the vendors either had Second World War or Napoleonics. Very few had ancients. No worries, though. I have enough unpainted lead to last me for quite a while.
The show was definitely a success. I had a lot of fun playing DBA and DBM. I also really enjoyed the painting classes. I ended up with a pretty packed schedule, so I didn't have a chance to play any other games. I don't remember seeing any crazy setups, although I didn't do much exploration beyond the NASAMW room. I do wish that Historicon and Origins weren't so close together, since I can only go to one of them. I am looking forward to Fall In. It should be a lot of fun as well.
I arrived at Cold Wars early Thursday afternoon. I was feeling a bit under the weather (yes, its been a rough beginning of the year), so I was a bit medicated. After enjoying a spicy dinner at the crazy Thai place, I kicked off the weekend with the Dismounting Armies DBA tournament. I played one of the classic "cheater" armies, the Anglo Normans (i.e., post-conquest Normans). In my first game, I played against the East Franks, which were very similar. I managed to shoot one of his knights pretty quickly, going up 1-0. Then I maneuvered to get a couple of double overlaps, but couldn't seal the deal. My opponent kept coming back, and slowly picked off my guys. He wen't up 3-1, but we managed to have two quick kill situations, one on my side and one on his. He won both rolls, so I lost the game 1-4. My next opponent played the Early Byzantines. It turned out to be a bad match up for him. He had mostly cavalry while I had all knights. I don't remember much of the action due to the cold medicine, but I do remember basically grinding him down with bad match ups. I won 4-2. In my final game, I played the Medieval French, one of the other classic "cheater" armies. I managed to do something right, and get my crossbows in front of his knights and my spearmen in front of his bows. He dismounted his knights to take on my bow, but I managed to work my knights into his blades. On the other side, my spearmen were making progress against his bows. I was up 3-2 and deliberating a move when they called "5 minutes", so I just said f--- it and charged a spear into an overlap position against a bow. I rolled a six, he rolled a one, and I finished the tournament 2-1. I ended up coming in third place, which wasn't bad for someone high on sudafed.
I felt a bit better Friday. I was supposed to teach a painting class at 10:00 and one at 3:00, then play in a DBA even that evening. At like 9:30 I found out that they messed up the schedule, and my classes were back to back at 12:00 and 2:00. I had a little bit of extra time, so I watched the beginning of the double DBA tournament and then walked around the flea market. I picked up a couple of stands of Gallic cavalry and warriors (you can never really have enough), but that was about it. I showed up around 11:30 for my first class, got everything set up, and no one made it. :-( It turned out that no one made any of the noon classes because of the scheduling snafu, so I gave one of the other artists a private class on painting horses. I did have two people show up for my 2 PM heraldry class, and they really enjoyed it. Its definitely a cool feeling when you teach someone something and you can see that they get it. One of the people attending does 1/300 aircraft, and we discussed some techniques for painting that as well. They complimented my both on my work and my teaching, so it was a very cool experience. I go to the crazy art college, and I'm a bit intimidated by some of the people there. Some of them are real artists, as in, have sculpted stuff for miniatures companies or have painted stuff for commission. I'm starting to feel a bit more comfortable there, and it really is a cool experience.
Friday night I got sucked into playing a game of DBM in 25mm instead of the DBA tournament. To be honest, I was still a bit tired, so I didn't mind a quick game. I played the Sciri, which is a Germanic tribe from the end of the 4th century AD. The army was composed of knights, warband, bows, and some allied Hunnic light horse. It was an army borrowed from a fellow DBM gamer, and it was painted beautifully. I played against a random Chinese army consisting of spearmen, bowmen, cavalry, and chariots. The guy set up in the corner, utilizing temporary fortifications to anchor his wing. I sent my warbands after his spearmen, my bows after his bows, and my mounted troops after his mounted troops. I figured, I have no idea how these armies work, so charging seemed like the right idea! I managed to gain an early advantage. The combined weight of my warband and bows broke his smaller spearmen command. Then his cavalry absolutely crushed the Huns. Ugh. I sent the knights in after the cavalry and chariots. I started to grind them down, but then he managed to break my warband command. Things were starting to get pretty hairy, where one or two losses on either side would determine the winner, when I made a rookie mistake. I advanced a column of knights, but left a kink in the line. Sure enough, I lost a combat in front of them, recoiled into the column, which killed the one guy needed to break the army. Oh well, it was a good game!
Saturday was the double DBM tournament. My partner and I played an Early Vietnamese army, affectionately known as a "wall of junk". It consisted of a bunch of inferior bow, a bunch of warbard, a bunch of mediocre light troops, and three elephants! The army had roughly 140 elements, which is more than double the size of my Norman army! Crazy. Our first game was against the Neo-Elamites, a biblical army with a very similar composition (IOW, wall of junk). Both armies stretched from board edge to board edge, so there wasn't any fancy maneuvering. We managed to get the favorable match ups, so ended up with a slight advantage. Since there were so many troops on the table, we ran out of time before either side completely broke. They did break one of our smaller commands, but we broke his C-in-C's command, so we won via points. Our second game was against the Later Achaemenid Persians, which was composed of a bunch of cavalry, a bunch of Greek hoplites, and a handful of lighter troops. They demonstrated on my wing, and sent the other cavalry command into our bows, where it was promptly shot to pieces. We simply charged the warband into the spear block, quickly breaking it in several bounds. It took us several more turns to break their army, but not before they broke the warband command. Ironically, the spearmen did more damage after they broke! Anyways, we had won again, so we were headed to the championship game! In that, we played a Bosporan army, composed of knights, light horse, and assorted light troops. We lined up with the auxilia in some bad going in the middle, the two bow commands on the wings, and the warband as a reserve. The Bosporans did a general advance, hitting our three main commands with knight attacks and adding the light horse to the center attack. Our middle command and right commands collapsed, but we managed to break their C-in-C command. We had lost two smaller commands, while they lost their biggest command. Now it was a race to see who could break the final command. I was doing alright holding off the knight command on the left, killing a knight and some light horse, and devastating the light infantry supporting them. Once again, I was in a situation where the next element lost determined the winner. They charged in with the knights, my bows held off a couple of attacks, but couldn't stop them all. My command finally broke, breaking our army. We were one element away from breaking theirs! Yet another close game. It was disappointing losing in the finals, but it was very cool actually making it there.
I did some shopping every day of the con. Overall, I thought it was a bit mediocre. I was mostly focused on ancients, and there weren't a lot of things to get. In addition to the Gauls, I got a half dozen Hundred Years War English longbowmen, a couple of army books for various games, an interesting book on the Mongols (which I'm halfway through by now), a used copy of Hornet Leader, and a copy of Steel Wolves (which I've been lusting over for quite a while). I was hoping for more in the way of painted guys, but most of the vendors either had Second World War or Napoleonics. Very few had ancients. No worries, though. I have enough unpainted lead to last me for quite a while.
The show was definitely a success. I had a lot of fun playing DBA and DBM. I also really enjoyed the painting classes. I ended up with a pretty packed schedule, so I didn't have a chance to play any other games. I don't remember seeing any crazy setups, although I didn't do much exploration beyond the NASAMW room. I do wish that Historicon and Origins weren't so close together, since I can only go to one of them. I am looking forward to Fall In. It should be a lot of fun as well.
Friday, February 18, 2011
On the Table: Saladin and His Army
In my previous two posts, I discussed painting an assortment of Muslim troops for my Ayybid Egyptian army. In this post, I will describe the last elements of the army and Saladin himself.
The last batch of troops needed for the DBM and FoG versions of the army are the Adath Militia. They represent the local town militias and were quite common in Syria. For my figures, I chose the standard palette and gave them generic Muslim heraldry. I did have one base of guys with a bit more interesting blazons. I suppose they were the more wealthy townsfolk!


Last, but not least, we have Saladin's figure. I spent some time agonizing over his banner, but in the end I decided to go with the Bismillah on a yellow banner. Most of the references that I found showed banners with some form of Islamic text, so it seemed appropriate. Yellow was the color of the Ayyubids, so I used that as the banner color. To make it, I laser printed the text and outline for the banner on regular paper. I painted the banner yellow, using a thin enough mixture so the text was still visible. Then I went over the text with some black paint. Finally, glued it to the staff and put a little kink in it so it looked like it was flowing in the wind. I also used yellow for Saladin's cloak and the shield and trim for the standard bearer. I used red for the other horsemen because it is an appropriate Muslim color and, well, I like it!


Shown below is the DBA version of the Ayyubid army. I painted all of the figures, just not all recently. We have the cavalry, Kurdish auxiliary, and the light archers from the previous blog entries. We have one stand of Mamluks that I painted a while back. You can tell them apart from the lancers by the barding on the horses. We also have a pair of Turkish horse archers and a stand of Bedouin light horse. Finally, we have a pair of stands of Sudanese archers. I've used the army in the past and have had pretty good success with it. It doesn't have any killer troops, but it also doesn't have any real weak spots. The army is very mobile, and if you are patient, you can capitalize on your opponents mistakes.


My next project is a Later Crusader army. I'm actually assembling figures for two armies: one representing the Kingdom of Jerusalem and the other representing the army of Richard the Lionheart on the Third Crusade. As with the Muslims, I already have a lot of "generic" figures for the army. What I'm doing now is adding a handful of figures that are specific for the period.
I'm still working on things, but here is a sneak peak. There are two stands of spearmen with the colors of the Kingdom of Jerusalem and a stand of spearmen in Richard's colors. They are flanked by several stands of Knights Hospitaller. The spearmen are some older figures that I had, but the knights are recently purchased from Legio Heroica. I hope to have another post soon describing the Crusader army.


The last batch of troops needed for the DBM and FoG versions of the army are the Adath Militia. They represent the local town militias and were quite common in Syria. For my figures, I chose the standard palette and gave them generic Muslim heraldry. I did have one base of guys with a bit more interesting blazons. I suppose they were the more wealthy townsfolk!


Last, but not least, we have Saladin's figure. I spent some time agonizing over his banner, but in the end I decided to go with the Bismillah on a yellow banner. Most of the references that I found showed banners with some form of Islamic text, so it seemed appropriate. Yellow was the color of the Ayyubids, so I used that as the banner color. To make it, I laser printed the text and outline for the banner on regular paper. I painted the banner yellow, using a thin enough mixture so the text was still visible. Then I went over the text with some black paint. Finally, glued it to the staff and put a little kink in it so it looked like it was flowing in the wind. I also used yellow for Saladin's cloak and the shield and trim for the standard bearer. I used red for the other horsemen because it is an appropriate Muslim color and, well, I like it!


Shown below is the DBA version of the Ayyubid army. I painted all of the figures, just not all recently. We have the cavalry, Kurdish auxiliary, and the light archers from the previous blog entries. We have one stand of Mamluks that I painted a while back. You can tell them apart from the lancers by the barding on the horses. We also have a pair of Turkish horse archers and a stand of Bedouin light horse. Finally, we have a pair of stands of Sudanese archers. I've used the army in the past and have had pretty good success with it. It doesn't have any killer troops, but it also doesn't have any real weak spots. The army is very mobile, and if you are patient, you can capitalize on your opponents mistakes.


My next project is a Later Crusader army. I'm actually assembling figures for two armies: one representing the Kingdom of Jerusalem and the other representing the army of Richard the Lionheart on the Third Crusade. As with the Muslims, I already have a lot of "generic" figures for the army. What I'm doing now is adding a handful of figures that are specific for the period.
I'm still working on things, but here is a sneak peak. There are two stands of spearmen with the colors of the Kingdom of Jerusalem and a stand of spearmen in Richard's colors. They are flanked by several stands of Knights Hospitaller. The spearmen are some older figures that I had, but the knights are recently purchased from Legio Heroica. I hope to have another post soon describing the Crusader army.


Sunday, January 30, 2011
On the Table: Muslim Mounted and Foot (Part Two)
In my first post, I described the early Muslim infantry that I recently painted as part of my Crusades project. In this post, I'm going to talk about figures that are specifically part of Crusader era Muslim armies. I purchased the figures specifically for my Ayyubid Egyptian army. This is the army led by Saladin which fought both the Kingdom of Jerusalem and King Richard the Lionheart's army in the Third Crusade.
The first batch of figures are four stands of javelinmen. They made up the bulk of the Muslim auxiliaries in the period, and could be of either Kurdish or Arabic origin. I used the same techniques as in my previous post: prime white, raw umber wash, paint the rest of the figure. I also used the "standard" Middle Eastern color palette. Since these troops were a step up from the city militia, I assumed that they would have less "natural" fiber. I painted them with a bit more color than the either the swordsmen or the archer. For the shields, I used designs almost exclusively from Saracenic Heraldry. Since these figure represent troops from the 12th and 13th centuries, I feel a lot more comfortable using the later devices.


Again, I'm pretty pleased with the results. The figures are from Legio Heroica, and I really like the sculpts. I also like the fact that the shields are separate from the figures, so you can really mix and match to get the effect that you want. The only down side is that the javelins are also separate, so you have to individually glue them. We'll have to see how they hold up with repeated play.
The last batch of troops are four stands of Arab lancers, also known as askari (Arabic for "soldier"). The made up the bulk of the heavy cavalry in Ayyubid armies. Unlike the Mamluks, which were slave soldiers specifically trained to fight, the askari were all nobles and free men. They would be the rough equivalent to knights in Western armies. One of the most famous (infamous?) of these troops is Usamah ibn-Munquidh, author of "An Arab-Syrian Gentleman and Warrior in the period of the Crusades." He lived during the first half of the 12th century, and his memoirs are quite an interesting read. The figures are all from Legio Heroica, same as the javelinmen.
Once again, I used the standard painting technique for these figures, somewhat altered to account for horses. For the horses, I started with whiter primer and a raw umber wash. Then, I block painted each horse with a different color according to the type of horse that I wanted to paint: brown for dark bay, sand for dun, mahogany for chestnut, toffee for roan. After that, I washed the horses again, using black for the bay and brown for the other colors. This really brings out the detail on the figures and makes the colors more lifelike. I then paint the manes and tails, black for bay, dark gray for dun, and brown for chestnut and roan. Finally, I add a few markings on the face and legs.


For the riders, I followed the standard Middle Eastern palette for color. As these would be nobles, I assumed that they would have brightly colored robes over their armor. All of the figures have armor, and about half of them have robes while the other half do not. The shields all had designs as part of the sculpts, so I didn't add any heraldry. I painted them using the standard palette, but picked colors to be aesthetically pleasing. (Pleasing to me, of course!)


That completes my post. These four stands will almost complete my Ayybid army. I still need to paint a few stands of militia, but I hope to complete them in the next week or so. Once they are done, then I'll create another post containing pictures of the entire army. After that, I will start cleaning up my Later Crusader army to provide an opponent for the Ayyubids.
As always, if you have any questions or comments, please feel free to ask.
Sunday, January 23, 2011
On the Table: Muslim Mounted and Foot (Part One)
The idea behind this post is to talk about my latest painting projects. I'd like to discuss both the history behind the figures, the inspiration behind the colors and designs, and the painting techniques that I used. Hopefully this will become a regular feature documenting my projects.
The first batch of figures are actually predate the Crusades. They are Dailami zupin men from Khurasan Miniatures. The Dailami were mountain people from northern Iran that appeared as mercenaries in Muslim armies from the 7th through 12th centuries. The "zupin" was a double headed spear (i.e., had points on both ends) and was their premier weapon. The Dailami had a well deserved reputation as fierce fighters.For these figures, I chose a generic "Middle Eastern" color palette of yellow, red, and blue, with some green and white as accents. These colors are based upon the dyes that would be available in that region: indigo (blue, saffron (yellow), and cochineal (red). I also used some green and white. It would also be common to see some "natural" fiber colors, too. See Dr Brendan Moyle's web site (http://users.actrix.co.nz/moyle/figs/standard.html) for more information.
Since I couldn't find any definite references, I chose basic Islamic designs. I used a couple of designs from Osprey's The Armies of Islam 7th–11th Centuries and a couple from Mayer's Saracenic Heraldry. For the shield colors, I stuck to the generic palette from above, picking shield colors that complement the clothing.I have been experimenting with a new painting technique, and I used it on these figures. I prime the figures white, then wash them with a thin raw umber wash. This helps bring out some details and works well for undyed clothing. It also helps fill in some "cracks" with color, which can be a problem when you prime white, since unpainted areas tend to stand out. I first read about the technique on Simon MacDowall's web site (http://legio-wargames.com) and have been really please with the results. After the wash, you paint the figures normally. For me, that means you start at the boots and work your way up the figure, finishing with the shield design. Finally, I base them on 3mm thick bases, apply some Woodland Scenics fine ballast, and then a few tufts of static grass. Voila!


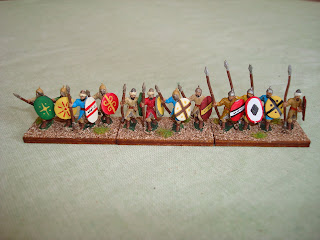

I'm pretty happy with the results. I think the stands look pretty good, and I now have a core groups of Dailami troops for all of my Muslim armies. I base all of my armies the same way so that they look consistent on the table. They might not always win, but at least they look good!
I also painted a couple of stands of Arab swordsmen from Khurasan. Originally, I was going to use them as Arab auxiliaries, but after seeing them, it was pretty clear that they were really Conquest era troops. I decided to paint and base them that way, so I can use them in early Islamic armies as swordsmen. It also gives me an excuse to build a Conquest army! I use the standard color palette and a lot of "natural" color. In fact, some of the figures are just washed, with no other colors applied to the clothing.


The next batch of figures are Arab archers, also from Khurasan. for these guys, I used the same color palette and the same painting techniques as mentioned above. The figures represent "generic" Arab skirmishing archers, and can be used from the time period of the Islamic Conquest until the 12th or 13th century. Like the swordsmen, I left quite a few of them in natural colors. And like the rest, I based them on thick bases with gravel and static grass.


This post turned out to be a lot longer than I had originally thought, so I'm going to break it up into two posts. The next post will focus on troops specific for the Crusades, which was actually the original point of the project!
Saturday, January 22, 2011
2010 In review
Its been over a year since I posted anything, and I have been doing a lot of gaming. I have focused almost exclusively on historical miniatures and World of Warcraft, really only playing other games at special events. I've found really good people to play with, so its been easy to focus on these two areas.
I got back into World of Warcraft over the summer. I got a Cataclysm beta key, but when I tried to use it, I found out that my account had been hacked! Of course, I had to log in to make sure that everything was okay. One thing led to another, and there I was playing again. My main character was on another server, so I moved him back to the original server, and I was ready to go.
Playing on the old server with the old guild was pretty awesome. Most of the old faces were there, and the new faces turned out to be super cool. The questing was a lot of fun and the high end content was also pretty interesting. The only downside to the whole thing was the gear grind. By this point in the expansion, most of the content was stupidly simple. It often took less than 15 minutes to complete a heroic dungeon. It was fun doing each one once, but then it became pretty boring. I did manage to get my main geared to the point that I was able to participate in my guild's first downing of the Lich King. That was an awesome experience.
I've spent the last month and a half playing Cataclysm. Its been a great experience. The questing was really, really good. Blizzard has done a great job with the phasing and quest design. The artwork was also top notch. The dungeons are a lot harder than before. I like that a lot, since it actually requires some planning to successfully complete them. My only complaint is about the crafting grind. It is really, really painful. We'll see if I still think that a couple of months from now. My guild is just starting to raid, and so far its been pretty tough. I'm looking forward to the progression.
On the historical minis front, I've been playing a lot of DBM and a little bit of FoG and DBA. I'm really starting to get into DBM. It has a LOT more going on than DBA, and I find that quite interesting. I've mostly been playing my Normans, although I will also play a Roman army on occasion. I still like both FoG and DBA, but I don't have as much chance to play them.
I did a lot of painting in the second half of the year. My first project involved wrapping up my Roman army. I painted a bunch of legionnaires, velites, and cavalry. My second project was going to be Alexander's Macedonians, but I haven't made much progress. My current project is Islamic and Crusader armies. I've painted a lot of Arab and related foot, as well as Muslim and crusader cavalry. I have been trying to be as accurate as possible regarding colors and shield designs, and I've been very happy so far with the results.
That's a short summary of the past year. I hope to start posting a bit more regularly. I have weekly WoW and mini sessions, as well as a constant flow of guys to paint. The plan is to create updates on all of these topics. Stay posted!
I got back into World of Warcraft over the summer. I got a Cataclysm beta key, but when I tried to use it, I found out that my account had been hacked! Of course, I had to log in to make sure that everything was okay. One thing led to another, and there I was playing again. My main character was on another server, so I moved him back to the original server, and I was ready to go.
Playing on the old server with the old guild was pretty awesome. Most of the old faces were there, and the new faces turned out to be super cool. The questing was a lot of fun and the high end content was also pretty interesting. The only downside to the whole thing was the gear grind. By this point in the expansion, most of the content was stupidly simple. It often took less than 15 minutes to complete a heroic dungeon. It was fun doing each one once, but then it became pretty boring. I did manage to get my main geared to the point that I was able to participate in my guild's first downing of the Lich King. That was an awesome experience.
I've spent the last month and a half playing Cataclysm. Its been a great experience. The questing was really, really good. Blizzard has done a great job with the phasing and quest design. The artwork was also top notch. The dungeons are a lot harder than before. I like that a lot, since it actually requires some planning to successfully complete them. My only complaint is about the crafting grind. It is really, really painful. We'll see if I still think that a couple of months from now. My guild is just starting to raid, and so far its been pretty tough. I'm looking forward to the progression.
On the historical minis front, I've been playing a lot of DBM and a little bit of FoG and DBA. I'm really starting to get into DBM. It has a LOT more going on than DBA, and I find that quite interesting. I've mostly been playing my Normans, although I will also play a Roman army on occasion. I still like both FoG and DBA, but I don't have as much chance to play them.
I did a lot of painting in the second half of the year. My first project involved wrapping up my Roman army. I painted a bunch of legionnaires, velites, and cavalry. My second project was going to be Alexander's Macedonians, but I haven't made much progress. My current project is Islamic and Crusader armies. I've painted a lot of Arab and related foot, as well as Muslim and crusader cavalry. I have been trying to be as accurate as possible regarding colors and shield designs, and I've been very happy so far with the results.
That's a short summary of the past year. I hope to start posting a bit more regularly. I have weekly WoW and mini sessions, as well as a constant flow of guys to paint. The plan is to create updates on all of these topics. Stay posted!
Wednesday, December 09, 2009
DBM: Normans in Action!
I finally had a chance to use my Normans. They squared off against Steve's Italian Lombards.
The Lombards set up as a big wall of troops. From left to right, he had knights (Irr Kn(F)), spear (Reg Sp(I)), and more knights. His right flank was anchored in a marsh guarded by some Ps and Bw.
The Norman battle groups were arranged with the Allies on the left, the smallest knight group in the middle, and the largest knight group on the right. The CinC's command formed a reserve in the rear. All of the Norman groups were set up in three "waves". The first wave was the knights, the second wave contained the bowmen, the third wave contained the other infantry. The Aghlabids had the LH and Cv in a group, with the infantry in a group in the rear.
From the get go, I advanced the Normans in echelon, with the right most group leading the way. The Norman right crashed into the Lombard left, beginning an epic Kn vs Kn battle. Even though I had the advantage on the flank, Steve was able to break through in the center of my line, despite losing his CinC in the second round of combat. I did manage to cause a lot of casualties, though, so while he broke my smallest command, his largest command was one stand away from breaking.
On the left flank, the Aghlabids moved up to skirmish with the Normans opposite of them. We exchanged casualties... two Lombard Kn for two Arab LH, but not much else happened. His bow caused a couple of stands of LH to flee, but that was it.
At that point, it was getting late so we decided to call it. The final result was a slight Lombard victory, although it was pretty close.
What did I learn? Well, Kn(F) die quickly! The combat penalty for F doesn't sound like much, but its surprising how many casualties were caused by it. Also, it seems like there is a lot to be learned about controlling impetuous troops. Even without the cheesy stuff, it appears that there is a lot that you can do with them (both offensively and defensively). Finally, I'm still getting used to some of the combat interactions. For example, Bw in two ranks is good for shooting but bad in melee... I learned that the hard way. :-(
Overall, though, it was a lot of fun and look forward to playing with them again.
Here's my army list:
Irr Kn(F) - CinC
Irr Kn(F) x5
Irr Sp(I) x6
Irr Bw(O) x6
Irr Hd(O) x1
18.5 EE, breaks at 6.5
Irr Kn(F) - SG
Irr Kn(F) x8
Irr Sp(I) x2
Irr Bw(I) x6
Irr Hd(O) x5
Irr LH(I) x2
21.5 EE, breaks at 7.5
Irr Kn(F) - SG
Irr Kn(F) x6
Irr Bw(I) x6
Irr Hd(O) x5
15.5 EE, breaks at 5
Aghlabid Allies – 3/33
Irr Cv(O) - AG
Irr Cv(O) x2
Irr LH(O) x5
Irr Ax(I) x4
Irr Sp(I) x4
14 EE, breaks at 5
EDIT: Here are some pics of the action at Steve's blog: http://huzzahespee.blogspot.com/
The Lombards set up as a big wall of troops. From left to right, he had knights (Irr Kn(F)), spear (Reg Sp(I)), and more knights. His right flank was anchored in a marsh guarded by some Ps and Bw.
The Norman battle groups were arranged with the Allies on the left, the smallest knight group in the middle, and the largest knight group on the right. The CinC's command formed a reserve in the rear. All of the Norman groups were set up in three "waves". The first wave was the knights, the second wave contained the bowmen, the third wave contained the other infantry. The Aghlabids had the LH and Cv in a group, with the infantry in a group in the rear.
From the get go, I advanced the Normans in echelon, with the right most group leading the way. The Norman right crashed into the Lombard left, beginning an epic Kn vs Kn battle. Even though I had the advantage on the flank, Steve was able to break through in the center of my line, despite losing his CinC in the second round of combat. I did manage to cause a lot of casualties, though, so while he broke my smallest command, his largest command was one stand away from breaking.
On the left flank, the Aghlabids moved up to skirmish with the Normans opposite of them. We exchanged casualties... two Lombard Kn for two Arab LH, but not much else happened. His bow caused a couple of stands of LH to flee, but that was it.
At that point, it was getting late so we decided to call it. The final result was a slight Lombard victory, although it was pretty close.
What did I learn? Well, Kn(F) die quickly! The combat penalty for F doesn't sound like much, but its surprising how many casualties were caused by it. Also, it seems like there is a lot to be learned about controlling impetuous troops. Even without the cheesy stuff, it appears that there is a lot that you can do with them (both offensively and defensively). Finally, I'm still getting used to some of the combat interactions. For example, Bw in two ranks is good for shooting but bad in melee... I learned that the hard way. :-(
Overall, though, it was a lot of fun and look forward to playing with them again.
Here's my army list:
Irr Kn(F) - CinC
Irr Kn(F) x5
Irr Sp(I) x6
Irr Bw(O) x6
Irr Hd(O) x1
18.5 EE, breaks at 6.5
Irr Kn(F) - SG
Irr Kn(F) x8
Irr Sp(I) x2
Irr Bw(I) x6
Irr Hd(O) x5
Irr LH(I) x2
21.5 EE, breaks at 7.5
Irr Kn(F) - SG
Irr Kn(F) x6
Irr Bw(I) x6
Irr Hd(O) x5
15.5 EE, breaks at 5
Aghlabid Allies – 3/33
Irr Cv(O) - AG
Irr Cv(O) x2
Irr LH(O) x5
Irr Ax(I) x4
Irr Sp(I) x4
14 EE, breaks at 5
EDIT: Here are some pics of the action at Steve's blog: http://huzzahespee.blogspot.com/
Monday, November 23, 2009
WoW at 80: Longer, not Harder
I finally hit 80 with my main last week. The last couple of levels went really quickly. I worked through a progression of quest hubs in Zul Drak and Ice Crown, got to see some cool phasing effects, and got set up for some of the main daily, rep grinds.
So, now what? The first thing I did was head over to the Argent Tournament area to do the Trial of the Champion instance. This is a really short instance, three bosses in 15 minutes. There is a small amount of trash before the first two, but its basically insignificant. When all is said and done, you get four purple drops from the three bosses. Lather, rinse, and repeat. As a whole, the group was pretty well geared, with me as the only "new" 80, but we had two random pugs with us and it was still trivially simple. After four runs, I ended up with four new items. Yay.
The rest of the game is all about the grind. You grind heriocs to get badges and gear for new 80s. You grind Wintergrasp to get honor for gems and shards for items. You grind your dailies to get rep to get gear. Of course, each faction has one piece of gear that you need, so you have to grind each one. Finally, you have to grind cooking and fishing quests to get the last of the recipes.
So far, none of these things has been difficult. I ran a couple of heroics with people that had decent gear, and they were trivially simple. I did a Wintergrasp battle, which was a lot of fun. However, this fight seemed pretty easy, which I assume is a combination of attacker usually winning and Horde usually winning. I've done a couple of the fishing and cooking dailies, which are cute the first time or two, but get old quickly. The cooking dailies allow you to get a new recipe every three days. With about 20 recipes available, you should have them all in two months.
I've been pretty underwhelmed. The graphics are great, the stories are reasonable, and some of the quests are kind of cool. I just have no desire to do the same thing over and over just to get better stuff to do the same thing over and over. I think I'm just so far behind the curve that its nearly impossible to find a group that makes anything challenging. And, to be honest, I think Blizzard wants it that way. They want everyone to feel like a bad ass. Wiping on bosses over and over to learn a fight is a thing of the past. Its much easier to put in that same amount of time killing boars, getting tokens, and then getting your gear. I guess more people would kill boars than wipe on a boss, even if means getting the same gear in about the same amount of time. Shrug.
I have a couple of low level alts that I play from time to time. I can play those toons and still get that sense of adventure that was there in the original game. You realize that it was a theme park back then, but that fact was pretty well hidden in what appeared to be a vast world. Now, the theme park thing is trumpeted as a feature, not a bug. Step right up, kill the "terrible" boss, and get an epic item as a souvenir. Shrug.
So, now what? The first thing I did was head over to the Argent Tournament area to do the Trial of the Champion instance. This is a really short instance, three bosses in 15 minutes. There is a small amount of trash before the first two, but its basically insignificant. When all is said and done, you get four purple drops from the three bosses. Lather, rinse, and repeat. As a whole, the group was pretty well geared, with me as the only "new" 80, but we had two random pugs with us and it was still trivially simple. After four runs, I ended up with four new items. Yay.
The rest of the game is all about the grind. You grind heriocs to get badges and gear for new 80s. You grind Wintergrasp to get honor for gems and shards for items. You grind your dailies to get rep to get gear. Of course, each faction has one piece of gear that you need, so you have to grind each one. Finally, you have to grind cooking and fishing quests to get the last of the recipes.
So far, none of these things has been difficult. I ran a couple of heroics with people that had decent gear, and they were trivially simple. I did a Wintergrasp battle, which was a lot of fun. However, this fight seemed pretty easy, which I assume is a combination of attacker usually winning and Horde usually winning. I've done a couple of the fishing and cooking dailies, which are cute the first time or two, but get old quickly. The cooking dailies allow you to get a new recipe every three days. With about 20 recipes available, you should have them all in two months.
I've been pretty underwhelmed. The graphics are great, the stories are reasonable, and some of the quests are kind of cool. I just have no desire to do the same thing over and over just to get better stuff to do the same thing over and over. I think I'm just so far behind the curve that its nearly impossible to find a group that makes anything challenging. And, to be honest, I think Blizzard wants it that way. They want everyone to feel like a bad ass. Wiping on bosses over and over to learn a fight is a thing of the past. Its much easier to put in that same amount of time killing boars, getting tokens, and then getting your gear. I guess more people would kill boars than wipe on a boss, even if means getting the same gear in about the same amount of time. Shrug.
I have a couple of low level alts that I play from time to time. I can play those toons and still get that sense of adventure that was there in the original game. You realize that it was a theme park back then, but that fact was pretty well hidden in what appeared to be a vast world. Now, the theme park thing is trumpeted as a feature, not a bug. Step right up, kill the "terrible" boss, and get an epic item as a souvenir. Shrug.
Monday, November 16, 2009
Impetus vs DBx: Basic Comparison
After my experience with Impetus at Fall In, I picked up a copy of the rules and the two "expansion" magazines. I spent most of last week reading the rules to get a better understanding of how they work. The description below is based on an email from my gaming group's mailing list. Note that I haven't had a chance to play Impetus again, but I'm going to try to set something up sometime soon.
Note: The description below assumes that you know something about DBx. I'll just comment in spots where Impetus is different.
Impetus is a unit based game. Each unit is comprised of 4 DBx stands. You could probably get away with 1 stand per unit if you adjust the scale. An average sized Impetus army seems to consist of 10-15 units, so to do it in full scale would require 40-60 stands.
Units in Impetus activate by command (think GBoH). Each side nominates a command, rolls 2d6 and adds the commander value. The highest roll activates. After the command is done with its activation, you repeat the process. That means that there is no guarantee of the order of activation, so it is possible for one side to activate all of its units before the other side.
Units activate individually, unless they are in a group (i.e., in contact with each other). This means that each unit must complete all of its actions before another unit can move. When a unit is activated, it can do things like rally, move, shoot, charge, fight in combat. That's right, combat is part of a units activation... there is not separate combat step. A unit can attempt to do multiple things, but there is usually a penalty. If it tries to move and fight, there is a penalty to its attack. If it tries to move multiple times, it must roll a Discipline check. If it fails, then it becomes Disordered. So you do have the option of pushing your troops, although there are some risks involved.
There are many ways that a unit can become Disordered. Failing a Discipline check when moving multiple times or attempting a "special" move, taking casualties, failing a charge, etc. There is a slight combat penalty for being Disordered, but there is a significant "performance" penalty, since there are a bunch of actions that a unit cannot take when Disordered. It appears that the optimum strategy is Disorder the segment of the line that you plan to attack.
Combat uses the "buckets of dice" approach. Each unit has a "VBU" rating and an "impetus" rating. If charging, you combine the values. If not, you just use the VBU rating. To give you some idea, French Knights have an 8 VBU and a 5 Impetus. Roman Legionnaires have a 6 VBU and 2 Impetus. Skirmishers have a 2 or 3 VBU and a 0 Impetus. Note that 0 Impetus units cannot charge formed units (i.e., non-skirmisher) and are instantly destroyed if contacted by them. Anyways, each side rolls the appropriate amount of dice (VBU + Impetus (if charging) + mods), scoring hits on 6s or pairs of 5s. Each side that took hits then makes a cohesion check by rolling a d6, adding the number of hits, and subtracting their VBU. If the score is 0 or lower, nothing additional happens. If the score is greater than 0, the unit takes that much damage. If a unit accumulates damage equal to or greater than its VBU, it is destroyed. If either unit suffers hits, it becomes Disordered at the end of combat. Whichever side takes the most damage (not to be confused with hits, which does make the process confusing) loses combat and is forced back. The winner can choose to pursue, and if it contacts the retreating unit, you repeat combat. Note that combat will continue until either a) there is a draw, b) the winner chooses not to pursue, or c) the winner pursues but fails to contact.
Victory is determined in a pretty standard way. IIRC a command breaks when it has suffered 1/3 losses and an army breaks when it has suffered 1/2 losses + broken commands. Note that units that route are removed from the table. I'm not sure if this applies to broken commands, but I think that it does. So once things go south, its probably going to end soon.
Overall, I think the game is pretty cool. It seems to be a bit simpler than DBx, which is both good and bad. I think the activation system causes it to be a bad multi-player game, since you have a lot of people sitting around waiting during each activation. I like the fact that combat moves units back and forth a bit, but I'm not a big fan that VBU contributes to both offense and defense. I'd have to play it a bit more to get a better feel for how things work.
IMO, its not "better" than DBx or FoG, just different. Its certainly an interesting set of rules. It definitely worth playing some more to get a better feel for how things work. I'd really like to try some games with asymmetric opponents: Romans vs Gauls, Crusaders vs Muslims, etc.
Note: The description below assumes that you know something about DBx. I'll just comment in spots where Impetus is different.
Impetus is a unit based game. Each unit is comprised of 4 DBx stands. You could probably get away with 1 stand per unit if you adjust the scale. An average sized Impetus army seems to consist of 10-15 units, so to do it in full scale would require 40-60 stands.
Units in Impetus activate by command (think GBoH). Each side nominates a command, rolls 2d6 and adds the commander value. The highest roll activates. After the command is done with its activation, you repeat the process. That means that there is no guarantee of the order of activation, so it is possible for one side to activate all of its units before the other side.
Units activate individually, unless they are in a group (i.e., in contact with each other). This means that each unit must complete all of its actions before another unit can move. When a unit is activated, it can do things like rally, move, shoot, charge, fight in combat. That's right, combat is part of a units activation... there is not separate combat step. A unit can attempt to do multiple things, but there is usually a penalty. If it tries to move and fight, there is a penalty to its attack. If it tries to move multiple times, it must roll a Discipline check. If it fails, then it becomes Disordered. So you do have the option of pushing your troops, although there are some risks involved.
There are many ways that a unit can become Disordered. Failing a Discipline check when moving multiple times or attempting a "special" move, taking casualties, failing a charge, etc. There is a slight combat penalty for being Disordered, but there is a significant "performance" penalty, since there are a bunch of actions that a unit cannot take when Disordered. It appears that the optimum strategy is Disorder the segment of the line that you plan to attack.
Combat uses the "buckets of dice" approach. Each unit has a "VBU" rating and an "impetus" rating. If charging, you combine the values. If not, you just use the VBU rating. To give you some idea, French Knights have an 8 VBU and a 5 Impetus. Roman Legionnaires have a 6 VBU and 2 Impetus. Skirmishers have a 2 or 3 VBU and a 0 Impetus. Note that 0 Impetus units cannot charge formed units (i.e., non-skirmisher) and are instantly destroyed if contacted by them. Anyways, each side rolls the appropriate amount of dice (VBU + Impetus (if charging) + mods), scoring hits on 6s or pairs of 5s. Each side that took hits then makes a cohesion check by rolling a d6, adding the number of hits, and subtracting their VBU. If the score is 0 or lower, nothing additional happens. If the score is greater than 0, the unit takes that much damage. If a unit accumulates damage equal to or greater than its VBU, it is destroyed. If either unit suffers hits, it becomes Disordered at the end of combat. Whichever side takes the most damage (not to be confused with hits, which does make the process confusing) loses combat and is forced back. The winner can choose to pursue, and if it contacts the retreating unit, you repeat combat. Note that combat will continue until either a) there is a draw, b) the winner chooses not to pursue, or c) the winner pursues but fails to contact.
Victory is determined in a pretty standard way. IIRC a command breaks when it has suffered 1/3 losses and an army breaks when it has suffered 1/2 losses + broken commands. Note that units that route are removed from the table. I'm not sure if this applies to broken commands, but I think that it does. So once things go south, its probably going to end soon.
Overall, I think the game is pretty cool. It seems to be a bit simpler than DBx, which is both good and bad. I think the activation system causes it to be a bad multi-player game, since you have a lot of people sitting around waiting during each activation. I like the fact that combat moves units back and forth a bit, but I'm not a big fan that VBU contributes to both offense and defense. I'd have to play it a bit more to get a better feel for how things work.
IMO, its not "better" than DBx or FoG, just different. Its certainly an interesting set of rules. It definitely worth playing some more to get a better feel for how things work. I'd really like to try some games with asymmetric opponents: Romans vs Gauls, Crusaders vs Muslims, etc.
Monday, November 09, 2009
Fall In AAR
I attended the Fall In historical miniatures convention in Gettysburg this weekend. We had quite a few people from our group in attendance, including our friend Mustafa who now lives in DC.
I arrived Thursday night, grabbed dinner, then participated in the DBA Wimpy Wars event. The event involved armies comprised of a minimum of six stands of skirmishers (light horse or psiloi). I used IV/47 Golden Horde with an army list consisting of 1xCv (G), 3xCv, 6xLH, 2xBw. I went 3-1 in the event, losing in the championship match. Oh well... maybe next time. It was a lot of fun. The DBA crowd is a fantastic bunch of guys, and I always have a good time when I play with them.
Mustafa arrived Friday morning with the relatively new Fantasy Flight game Chaos in the Old World. We both wanted to play it, so we found a third person (it requires 3 or 4 players) and went to it. It was a learning experience for us, but the game moved along rather well. Sadly, the third player had to leave when we were halfway done. Still, I found the game very enjoyable. Its a multiplayer game of world domination/destruction. Its interesting in that there are a couple of ways to win and each faction has a different set of abilities and objectives. More on this later...
On Friday afternoon, we played in an Impetus learning scenario. Impetus is a set of ancient and medieval warfare miniature rules. The scenario was a typical Greek Hoplite battle pitting two armies consisting of spearmen and skirmishers against each other. Each side chooses a command to activate and rolls two dice. The winning side activates the command by moving, fighting, and/or shooting. Then the two sides repeat until all commands have acted. Combat uses the "buckets of dice" mechanic, with the number of dice rolled determined by the unit type and situational modifiers. The side that suffers the most hits loses combat and is pushed back. The winner has the option to pursue, triggering another round of combat if the pursuit is successful. Combat continues until one unit breaks or the winning unit fails to maintain contact. I thought the game worked very well. The mechanics are quite elegant, which allows the game to really flow. Players have interesting decisions to make, ranging from which command to activate to pushing units to take additional moves at the risk of disruption. I was impressed enough to purchase the rules.
After the Impetus match, we decided to grab some dinner and try Chaos in the Old World again. We had three players again this time: Mustafa playing Khorne, Roy playing Nurgle, and me playing Tzeentch. I altered my strategy a bit from the first game, focusing more on my disruptive magic instead of direct action. It worked rather well, allowing me to get an early lead. Things tightened up in the mid game, but I still hung on. When I got my second upgrade, I decided to take a chance, announcing that I might be snatching defeat from the jaws of victory. It turns out that I was right. I wasn't able to utilize my new ability and Mustafa pulled ahead. I had a chance to tie it in the end, but a string of bad luck prevented it and sealed Mustafa's victory. It was a pretty close game and was a lot of fun. I liked the game a lot. Each faction is quite different, but they all seemed pretty balanced to me. One word of warning... The game is designed with the assumption that there will be a lot of backstabbing among the players. It is definitely not for the faint of heart.
On Saturday morning, Roy, Mustafa, and I spent a couple of hours playtesting our new air combat rules. Mustafa and I used to be really into WWII air combat gaming, but ended up falling out of it. We decided to write our own rules, with the goal of getting something between the fidelity of Fighting Wings and the playability of Check Your 6. We had a pretty good session, putting the game through its paces and creating a list of comments. We are pretty close on the flight model, but we have a bit of work to do on the combat system. My goal is to have something worth playtesting by spring, hosting a demo game at either Cold Wars or Historicon. Hopefully I'll have a chance to work on the game over the holidays.
The last event that I played in was a DBM game Saturday evening. I used a borrowed Visogothic army and fought a Han Chinese army. My opponent set up defensively in a corner, forcing me to try to dig him out. On my right flank, his light horse and bows tried to disrupt my knights and cavalry. In the center, my warband were delayed by skirmishing light horse. Luckily, I had a couple of elements of cavalry on my left flank that could move unopposed. The cavalry fell upon the Chinese camp, while the knights and cavalry duked it out with the bows. I was able to cause a lot of casualties, but eventually my command broke. Luckily, my cavalry was able to make short work of the baggage, and coupled with a few additional casualties, I was able to break a command and then the army. Thanks go to Rich, my opponent, and Howard, who loaned me the army. Also thanks to the whole DBM crew, who answered all of my questions and provide a few tips along the way.
The shopping was okay, not great. The flea market was a bit disappointing. I had hoped to pick up some cheap guys, but there were few to be found. I did pick up a copy of Funcken's Age of Chivalry and Arms and Uniforms, which made me quite happy. I picked up a couple of other books as well. Overall, the shopping was a bit meh... Oh well, you can't have it all.
IMO, the convention was a great success. I enjoyed all of the games that I played and I got to hang out with friends. I have a lot going on at work and at home, and this was a fantastic way to spend a weekend.
I arrived Thursday night, grabbed dinner, then participated in the DBA Wimpy Wars event. The event involved armies comprised of a minimum of six stands of skirmishers (light horse or psiloi). I used IV/47 Golden Horde with an army list consisting of 1xCv (G), 3xCv, 6xLH, 2xBw. I went 3-1 in the event, losing in the championship match. Oh well... maybe next time. It was a lot of fun. The DBA crowd is a fantastic bunch of guys, and I always have a good time when I play with them.
Mustafa arrived Friday morning with the relatively new Fantasy Flight game Chaos in the Old World. We both wanted to play it, so we found a third person (it requires 3 or 4 players) and went to it. It was a learning experience for us, but the game moved along rather well. Sadly, the third player had to leave when we were halfway done. Still, I found the game very enjoyable. Its a multiplayer game of world domination/destruction. Its interesting in that there are a couple of ways to win and each faction has a different set of abilities and objectives. More on this later...
On Friday afternoon, we played in an Impetus learning scenario. Impetus is a set of ancient and medieval warfare miniature rules. The scenario was a typical Greek Hoplite battle pitting two armies consisting of spearmen and skirmishers against each other. Each side chooses a command to activate and rolls two dice. The winning side activates the command by moving, fighting, and/or shooting. Then the two sides repeat until all commands have acted. Combat uses the "buckets of dice" mechanic, with the number of dice rolled determined by the unit type and situational modifiers. The side that suffers the most hits loses combat and is pushed back. The winner has the option to pursue, triggering another round of combat if the pursuit is successful. Combat continues until one unit breaks or the winning unit fails to maintain contact. I thought the game worked very well. The mechanics are quite elegant, which allows the game to really flow. Players have interesting decisions to make, ranging from which command to activate to pushing units to take additional moves at the risk of disruption. I was impressed enough to purchase the rules.
After the Impetus match, we decided to grab some dinner and try Chaos in the Old World again. We had three players again this time: Mustafa playing Khorne, Roy playing Nurgle, and me playing Tzeentch. I altered my strategy a bit from the first game, focusing more on my disruptive magic instead of direct action. It worked rather well, allowing me to get an early lead. Things tightened up in the mid game, but I still hung on. When I got my second upgrade, I decided to take a chance, announcing that I might be snatching defeat from the jaws of victory. It turns out that I was right. I wasn't able to utilize my new ability and Mustafa pulled ahead. I had a chance to tie it in the end, but a string of bad luck prevented it and sealed Mustafa's victory. It was a pretty close game and was a lot of fun. I liked the game a lot. Each faction is quite different, but they all seemed pretty balanced to me. One word of warning... The game is designed with the assumption that there will be a lot of backstabbing among the players. It is definitely not for the faint of heart.
On Saturday morning, Roy, Mustafa, and I spent a couple of hours playtesting our new air combat rules. Mustafa and I used to be really into WWII air combat gaming, but ended up falling out of it. We decided to write our own rules, with the goal of getting something between the fidelity of Fighting Wings and the playability of Check Your 6. We had a pretty good session, putting the game through its paces and creating a list of comments. We are pretty close on the flight model, but we have a bit of work to do on the combat system. My goal is to have something worth playtesting by spring, hosting a demo game at either Cold Wars or Historicon. Hopefully I'll have a chance to work on the game over the holidays.
The last event that I played in was a DBM game Saturday evening. I used a borrowed Visogothic army and fought a Han Chinese army. My opponent set up defensively in a corner, forcing me to try to dig him out. On my right flank, his light horse and bows tried to disrupt my knights and cavalry. In the center, my warband were delayed by skirmishing light horse. Luckily, I had a couple of elements of cavalry on my left flank that could move unopposed. The cavalry fell upon the Chinese camp, while the knights and cavalry duked it out with the bows. I was able to cause a lot of casualties, but eventually my command broke. Luckily, my cavalry was able to make short work of the baggage, and coupled with a few additional casualties, I was able to break a command and then the army. Thanks go to Rich, my opponent, and Howard, who loaned me the army. Also thanks to the whole DBM crew, who answered all of my questions and provide a few tips along the way.
The shopping was okay, not great. The flea market was a bit disappointing. I had hoped to pick up some cheap guys, but there were few to be found. I did pick up a copy of Funcken's Age of Chivalry and Arms and Uniforms, which made me quite happy. I picked up a couple of other books as well. Overall, the shopping was a bit meh... Oh well, you can't have it all.
IMO, the convention was a great success. I enjoyed all of the games that I played and I got to hang out with friends. I have a lot going on at work and at home, and this was a fantastic way to spend a weekend.
Subscribe to:
Posts (Atom)